Create a Linux system using Buildroot
Buildroot is a set of tools to simplify the process of bootstrapping a Linux distribution for embedded devices. The project is fully open source and is driven by its community which keeps it updated and functional. It is an excellent choice for most embedded applications. It significantly simplifies the creation of a complete embedded system by providing an easy-to-use configuration system that includes a kernel-style menuconfig, an interactive download mechanism and a flexible overlay system.
Designed to manage the entire build process autonomously, Buildroot requires only that you choose the components you wish to include. From there, it will download, configure, compile and install everything without the need for additional manual setup. In about 30 minutes of build time, it will generates a fully functional image that you can flash on the ROM of your embedded device.
Prerequisites
In order to follow this guide, you will need:
- a UNIX-like system such as GNU/Linux or macOS;
- a C/C++ compiler;
- Basic build utilities, such as
build-essentialon Debian distributions; - At least
15 GiBof free space available; - A Raspberry Pi 3/4/ZeroW;
- An UART device.
For a full list of updated requirements, you can visit this page. You should also have some knowledge on how to use a Linux system and how to fix normal issues by yourself.
Downloading Buildroot
You can obtain Buildroot through three different methods:
- LTS release (currently
2020.02.8); - Stable release (currently
2020.08.2); - Latest release candidate.
At the time of writing this article, I’m using the stable release; however, any other version will be just fine. Buildroot can be downloaded from this link.
Set up your target architecture
Once you’ve downloaded one of the available releases, extract the archive file and then
search your target architecture. By default, Buildroot stores supported architectures
under the configs/ directory. For instance, if we want to target the Raspberry Pi Zero, we
should use one of the following configuration files:
$ ls -lh configs | grep raspberry
.rw-r--r-- marco marco  1.1 KB Mon Jun 16 23:13:14 2019 raspberrypi0_defconfig
.rw-r--r-- marco marco    1 KB Mon Jun 16 23:13:14 2019 raspberrypi0w_defconfig
.rw-r--r-- marco marco  1.1 KB Mon Jun 16 23:13:14 2019 raspberrypi2_defconfig
.rw-r--r-- marco marco  1.2 KB Mon Jun 16 23:13:14 2019 raspberrypi3_64_defconfig
.rw-r--r-- marco marco  1.1 KB Mon Jun 16 23:13:14 2019 raspberrypi3_defconfig
.rw-r--r-- marco marco  1.5 KB Mon Jun 16 23:13:14 2019 raspberrypi3_qt5we_defconfig
.rw-r--r-- marco marco  1.1 KB Mon Jun 16 23:13:14 2019 raspberrypi4_64_defconfig
.rw-r--r-- marco marco  1.1 KB Mon Jun 16 23:13:14 2019 raspberrypi4_defconfig
.rw-r--r-- marco marco  1.1 KB Mon Jun 16 23:13:14 2019 raspberrypi_defconfig
To select raspberry0w_defconfig, type make raspberrypi0w_defconfig.
The other relevant directories are:
board/: configuration files for officially supported platforms;configs/Build: configuration files for officially supported boards;output/Output: images, packages and configuration files;package/Build: scripts for supported packages.
System Setup
Now that we have selected the target platform, it’s time to configure our system. Before
proceeding, however, we must set up a cross compiler. This is needed due to the fact
that the RPI uses an ARM CPU whereas our development environment is likely an x86 system;
therefore, we also need to set up a compatible version of binutils. Since this is a
time consuming and error-prone task to do manually, we can delegate it to Buildroot
by simply running make all.
Once this initial step is finished, we can run make menuconfig to open Buildroot interactive
configuration menu. You should be welcomed by a window similar to the following one:
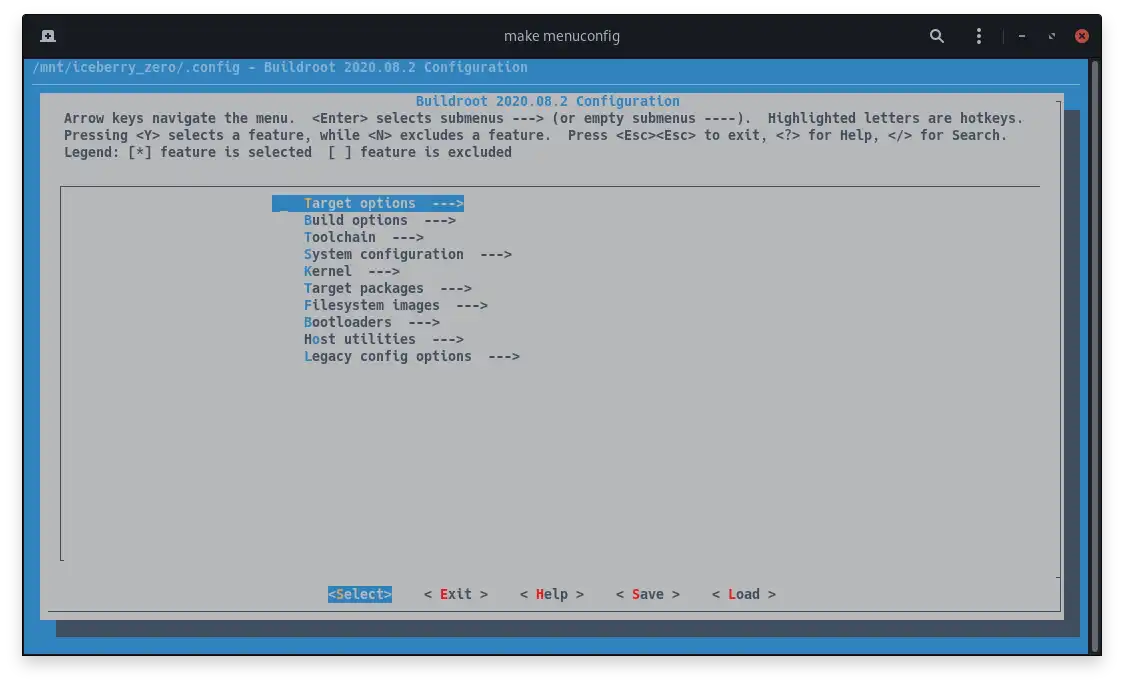
This is the usual configuration menu used by Linux developers to configure the kernel. If you have already seen such menu before, you probably know how useful and well organized it is compared to manual file editing. By moving the cursor with the keyboard arrows, you can enter the various sub-menus and select what you want to include. Below, I’ve made a list of the bare minimum modules needed by the RPI Zero platform. I’ve included support for Wi-Fi, OpenSSH and core utilities.
Let’s start by enabling the compiler cache by going to build and then toggling the following
value:
Build options -> Enable compiler cache (BR2_CCACHE)Under toolchain enable WCHAR support, this is need by some packages
such as bash or vim:
Toolchain -> Enable WCHAR support (BR2_TOOLCHAIN_BUILDROOT_WCHAR)Under the system configuration sub menu, you can customize the system by changing the default
hostname, the system banner, the default root password and the default shell (I suggest you
to replace the raw busybox default shell into something more polished such as Bash):
System configuration -> System hostname (BR2_TARGET_GENERIC_HOSTNAME)
System configuration -> System banner (BR2_TARGET_GENERIC_ISSUE)
System configuration -> Root password (BR2_TARGET_GENERIC_ROOT_PASSWD)
System configuration -> /bin/sh (busybox' default shell)  ---> (x) Bash
Note that, in order to change the default shell, you may need to enable
the BR2_PACKAGE_BUSYBOX_SHOW_OTHERS flag under Target packages sub menu.
Let’s now move to the target packages sub menu. Here, you can select which packages supported
by Buildroot to install. Below, there’s a comprehensive list of the most common packages that
you may want to include in your target system. You can exclude anything that seems irrelevant
for your use case.
Target packages -> Shell and utilities -> bash completion (BR2_PACKAGE_BASH_COMPLETION)
Target packages -> Shell and utilities -> sudo (BR2_PACKAGE_SUDO)
Target packages -> Shell and utilities -> time (BR2_PACKAGE_TIME)

Target packages -> Hardware handling -> Firmware -> rpi-wifi-firmware (BR2_PACKAGE_RPI_WIFI_FIRMWARE)

Target packages -> Interpreter languages and scripting -> Python3 (BR2_PACKAGE_PYTHON3)

Target packages -> Networking applications -> wget (BR2_PACKAGE_WGET)
Target packages -> Networking applications -> wpa_supplicant (BR2_PACKAGE_WPA_SUPPLICANT)
Target packages -> Networking applications -> wpa_supplicant -> Enable nl80211 support (BR2_PACKAGE_WPA_SUPPLICANT_NL80211)
Target packages -> Networking applications -> wpa_supplicant -> Enable AP mode (BR2_PACKAGE_WPA_SUPPLICANT_AP_SUPPORT)
Target packages -> Networking applications -> wpa_supplicant -> Enable autoscan (BR2_PACKAGE_WPA_SUPPLICANT_AUTOSCAN)
Target packages -> Networking applications -> wpa_supplicant -> Enable WPA3 support (BR2_PACKAGE_WPA_SUPPLICANT_WPA3)
Target packages -> Networking applications -> wpa_supplicant -> Install wpa_cli binary (BR2_PACKAGE_WPA_SUPPLICANT_CLI)
Target packages -> Networking applications -> wpa_supplicant -> Install wpa_client shared library (BR2_PACKAGE_WPA_SUPPLICANT_WPA_CLIENT_SO)
Target packages -> Networking applications -> wpa_supplicant -> Install wpa_passphrase binary (BR2_PACKAGE_WPA_SUPPLICANT_PASSPHRASE)
Target packages -> Networking applications -> iptables (BR2_PACKAGE_IPTABLES)
Target packages -> Networking applications -> ntp (BR2_PACKAGE_NTP)
Target packages -> Networking applications -> ntp -> sntp (BR2_PACKAGE_NTP_SNTP)

Target packages -> Libraries -> Networking -> libcurl -> curl binary (BR2_PACKAGE_LIBCURL_CURL)

Target packages -> System Tools -> htop (BR2_PACKAGE_HTOP)

Target packages -> Text editors and viewers -> vim (BR2_PACKAGE_VIM)

Target packages -> Hardware handling -> rng-tools (BR2_PACKAGE_RNG_TOOLS)
Target packages -> Hardware handling -> NIST Entropy Beacon support (BR2_PACKAGE_RNG_TOOLS_NISTBEACON)

Target packages -> Libraries -> Crypto -> gnutls (BR2_PACKAGE_GNUTLS)
Target packages -> Libraries -> Crypto -> gnutls -> OpenSSL compatibility library (BR2_PACKAGE_GNUTLS_OPENSSL)
Target packages -> Libraries -> Crypto -> gnutls -> install tools (BR2_PACKAGE_GNUTLS_TOOLS)
Target packages -> Libraries -> Crypto -> CA Certificates (BR2_PACKAGE_CA_CERTIFICATES)
Have you ever noticed the small logo displayed at the top of the TTY, representing the number of CPU cores? That is:
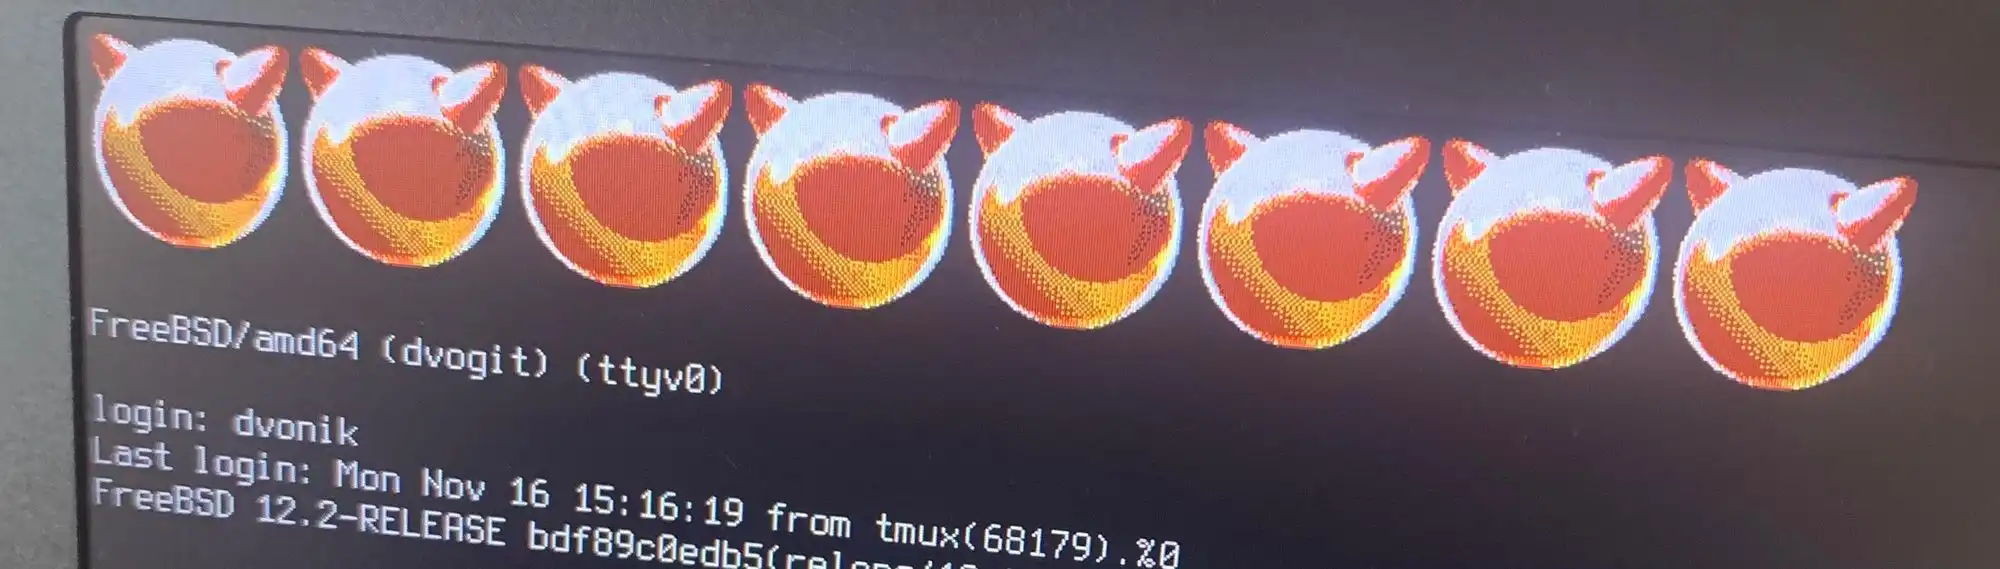
This is known as the framebuffer logo and although you can simply leave it unchanged,
it is nice to have the option to change it. In some cases, you may even be required to replace
the default Raspbian logo with the branding provided by your company. Traditionally, updating
the framebuffer logo was a tedious and error-prone process but with Buildroot, this procedure
becomes quick and straightforward (that means that you don’t have to deal with
format conversions anymore). All you need is a 64x64 PNG or JPG image with a
black background (for the latter format) placed in the root of your Buildroot directory. Then,
in menuconfig, set the value of BR2_LINUX_KERNEL_CUSTOM_LOGO_PATH to the absolute path of
your custom image.
Once you are satisfied with your configuration, save the file and then exit from menuconfig.
Kernel configuration
Another advantage of Buildroot is the ability to manually configure the kernel (Linux); this
can be useful if you intend to enable or disable features beyond the default settings. To access
this configuration interface, simply run make linux-menuconfig, which will open another
configuration menu.
While for many projects adjusting the kernel is unnecessary (the default configuration is
typically sufficient and will work out of the box), for the sake of this tutorial, we will
look at how to remove a component. For instance, since I do not intend to use audio on my
RPI Zero, I can safely disable ALSA support (CONFIG_SND):
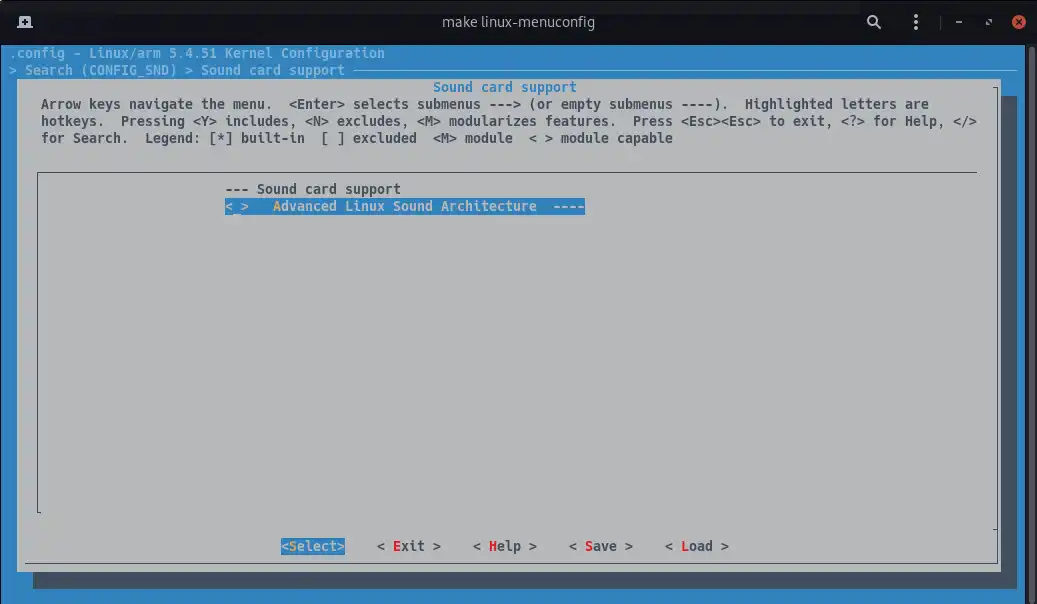
Once done that, save the configuration file and then run again make all. Buildroot
will download, compile and install everything we configured so far.
Init system
As you may have noticed, throughout the system configuration process we have not yet discussed
one of the most critical components of any operating system: its init system. By default, Buildroot
ships with the default Busybox init system which is a solid choice for an embedded device since
it is small, fast and has no external dependencies. However, if you would like to use another
init system (such as systemd), you can do so from System configuration -> Init system.
Keep in mind that systemd requires a different file system skeleton and some larger dependencies
such as dbus and udev. Therefore this configuration is not supported by this guide.
Overlay filesystem
Even after selecting all the packages required by your embedded project, none of them are actually configured yet. You could also configure everything manually after installation, but what if you are expected to ship the system with a predefined SSH configuration or a specific netfiler ruleset?
To address this kind of problem, Buildroot provides an elegant mechanism for managing configuration files and startup scripts: overlays. An overlay is simply a directory that mirrors the structure of the target root filesystem. Any files placed there will be copied into the final image during the build process.
For example, if you want to place a file inside the /etc/ssh/ directory, you only need to create
the following structure:
overlayfs
└── etc
    └── ssh
        └── sshd_config
2 directories, 1 file
Buildroot will copy this file into the image according to the absolute path of the overlay you have
specified on the BR2_ROOTFS_OVERLAY value inside the Buildroot menu. Once it has been
registered, we can start tweaking the default settings of the system. We will start from OpenSSH:
$ mkdir -p $OVERLAY_FS/etc/ssh
$ cp -R output/target/etc/ssh/sshd_config $OVERLAY_FS/etc/ssh
$ vim $OVERLAY_FS/etc/ssh/sshd_config # Edit ssh server
By default, OpenSSH does not permit remote root login. If, however, you require this feature for
the first boot, you can enable it by adding PermitRootLogin yes to the sshd_config file.
Another thing that we need to take care is the fact that the default SSH init script kills
active connection during restart actions (that is, when you invoke /etc/init.d/S50sshd restart).
To avoid this, we can create the following directories inside the overlay:
$ mkdir -p $OVERLAY_FS/etc/init.d
$ cp -R output/target/etc/init.d/S50sshd $OVERLAY_FS/etc/init.d
And then edit the SSH configuration file (vim $OVERLAY_FS/etc/init.d/S50sshd) like so:
...
20 stop() {
21      printf "Stopping sshd: "
22      killall sshd
23      rm -f /var/lock/sshd
24      echo "OK"
25 }
26 restart() {
27      kill -HUP $(cat /var/run/sshd.pid)
28      echo "OK"
29 }
By doing this, the SSH daemon will be restarted without killing out the active sessions.
Let’s now move to configure Wi-Fi connection. By default, the kernel does not load the
module for the RPI Zero network card. Thus, we need to do so manually from the inittab file:
$ cp -R output/target/etc/inittab $OVERLAY_FS/etc
$ vim $OVERLAY_FS/etc/inittab # Edit inittab file
#+end_code

By adding the following configuration:

```shell
16 # Startup the system
17 ::sysinit:/bin/mount -t proc proc /proc
18 ::sysinit:/bin/mount -o remount,rw /
19 ::sysinit:/bin/mkdir -p /dev/pts /dev/shm
20 ::sysinit:/bin/mount -a
21 ::sysinit:/sbin/swapon -a
22 null::sysinit:/bin/ln -sf /proc/self/fd /dev/fd
23 null::sysinit:/bin/ln -sf /proc/self/fd/0 /dev/stdin
24 null::sysinit:/bin/ln -sf /proc/self/fd/1 /dev/stdout
25 null::sysinit:/bin/ln -sf /proc/self/fd/2 /dev/stderr
26 ::sysinit:/bin/hostname -F /etc/hostname
27 ::sysinit:/sbin/modprobe brcmfmac
28 # now run any rc scripts
29 ::sysinit:/etc/init.d/rcS
Then, we can configure the network interface:
mkdir -p $OVERLAY_FS/etc/network
cp -R output/target/etc/network/interfaces $OVERLAY_FS/etc/network
vim $OVERLAY_FS/etc/network/interfaces # Edit the interfaces
by adding this:
# interface file auto-generated by buildroot

auto lo
iface lo inet loopback

auto wlan0
iface wlan0 inet dhcp
pre-up wpa_supplicant -B -Dnl80211 -iwlan0 -c/etc/wpa_supplicant.conf
post-down killall -q wpa_supplicant
wait-delay 15
udhcpc_opts -t 10
iface default inet dhcp
On the next boot, the system will load the Wi-Fi module, configure the interface, execute
the wpa_supplicant command using /etc/wpa_supplicant.conf and, finally, negotiate an IP
address using DHCP.
Serial communication
Debugging an embedded system can be very tricky, especially when you have to figure out
which parts of your system do not work and you do not have any output interface beside
a serial port. In such cases, an UART (Universal Asynchronous Receiver-Transmitter) device
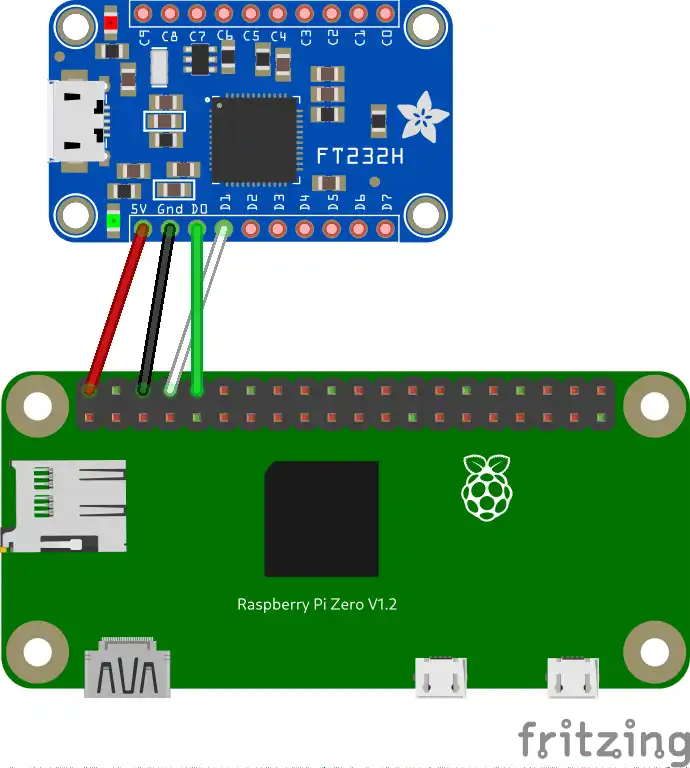
is an essential tool to exchange data with your embedded device. In this guide, I will be using
the Adafruit FT232H which also supports a wide range of serial protocols such as SPI, I2C, JTAG
and many more. Whatever you choose to use, you will need to connect the RX and the
DX pins and the usual VCC and GND to power up the Raspberry Pi Zero. In other words,
you should replicate the following wiring:
Once the circuit is configured, connect the UART device to your computer using the USB interface, open up a terminal and run the following command:
$ screen /dev/ttyUSBX 115200              # for GNU/Linux
$ screen /dev/tty.usbserial-XXXXX 115200  # for macOS
Be sure to replace the X with the correct device. If you are on Windows, you can use GNU
screen through PuTTY or by using WSL. The second parameter of the command is the baud rate,
that is the number of symbols per seconds. If you didn’t change it from the Buildroot menu, it
should be set at 115200 by default.
Initial configuration
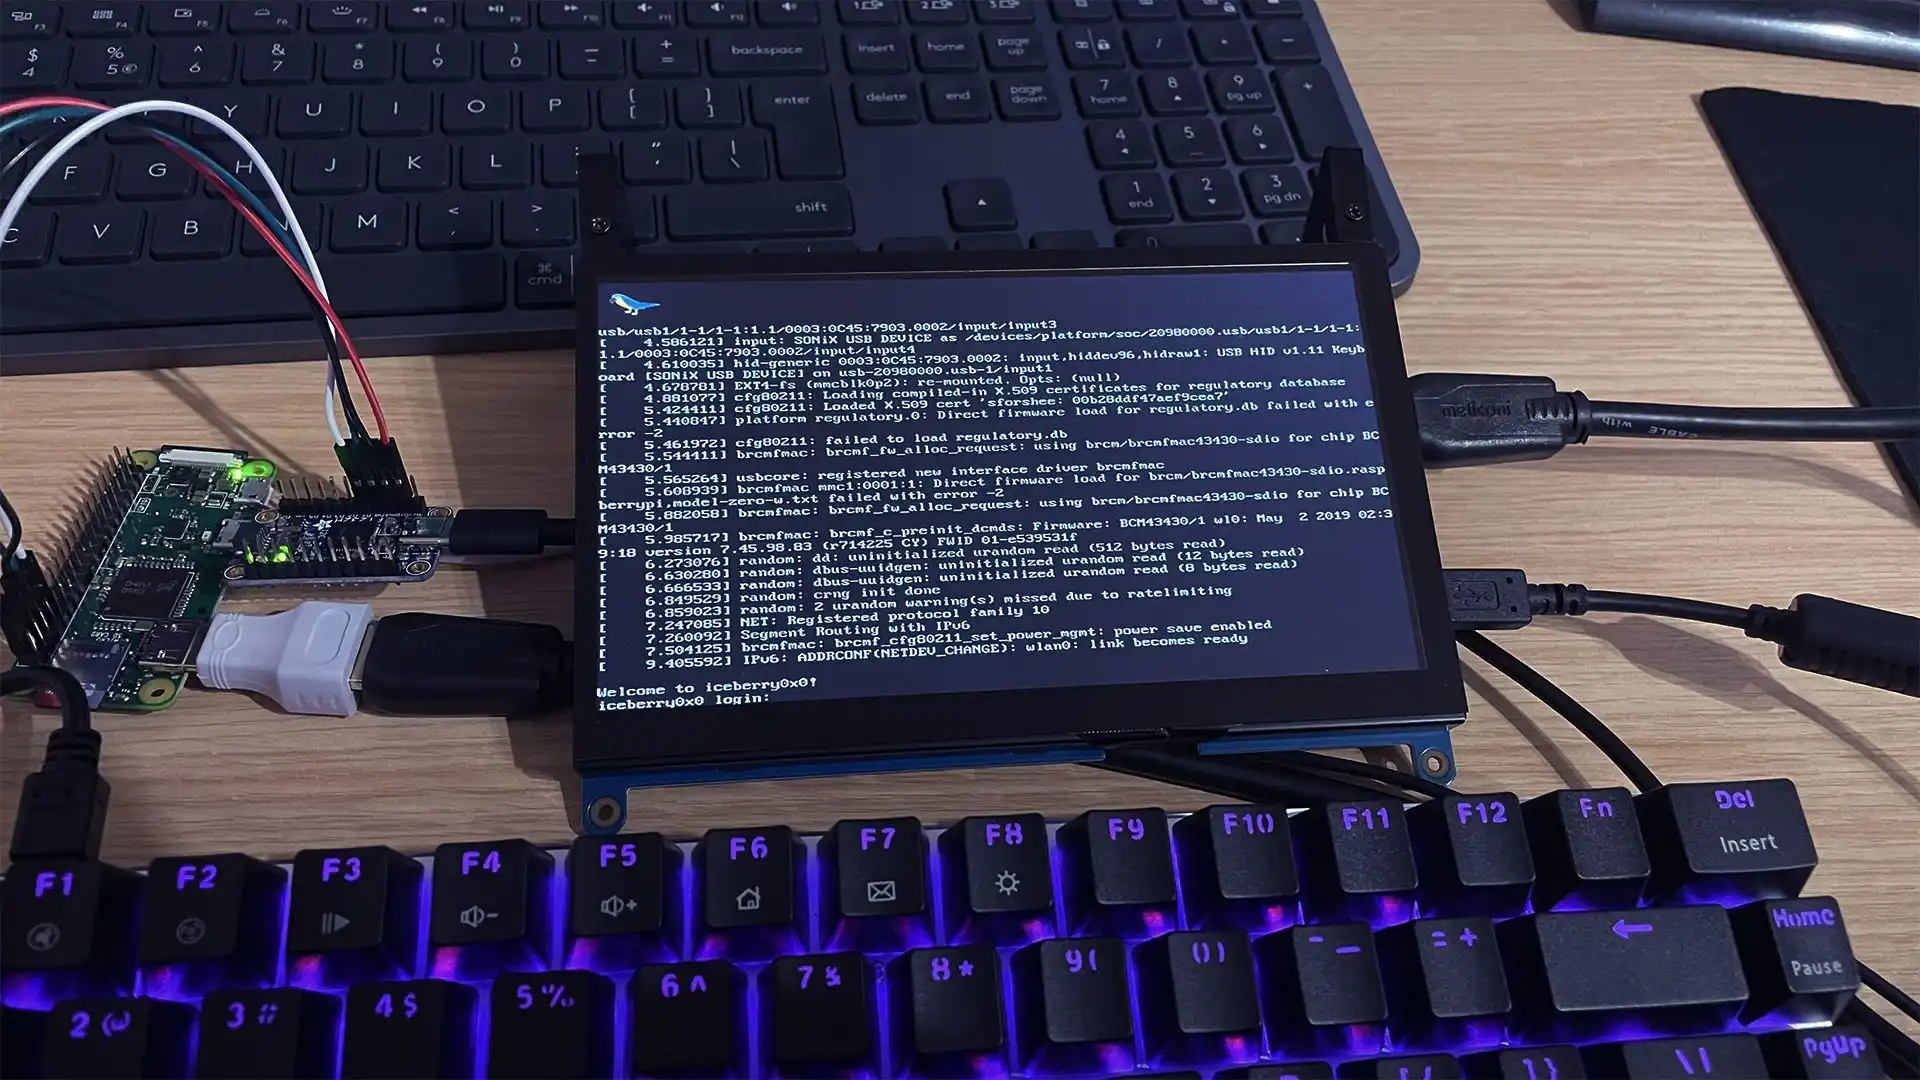
Once serial communication is ready and the device is powered on, you should start to receive the system logs on your terminal:
Once the system has loaded, you should be able to log in using the root account with the
password you have set on the Buildroot configuration. Note that, on the first boot, the Wi-Fi
connection will fail since no network has been configured yet. This will hang the system for
about 10 seconds (after that, udhcpc will desist from trying to negotiate an IP address).
Let’s configure a wireless connection:
# wpa_passphrase "SSID_NAME" "NETWORK_PW" >> /etc/wpa_supplicant.confBe sure to delete any other occurrence of the network entry inside the wpa_supplicant.conf
file. You should have something like this:
ctrl_interface=/var/run/wpa_supplicant
ap_scan=1

network={
     ssid="Router1"
     #psk="a_bad_pw"
     psk=XXX
}
After a reboot, the Raspberry should be able to connect to the network by itself, let’s try to retrieve its local IP address by using this command:
# ip a | grep wlan0 | grep inet | awk '{print $2}' | sed '$s/...$//'At this point, you should be able to connect to your device using SSH.
The next step is to configure a new user. To do so, issue the following commands:
# mkdir -p /home
# adduser -G users -s /bin/bash marco
Changing password for marco
New password:
Retype password:
passwd: password for marco changed by root
Let’s then add this user to the sudoers file by running the visudo command:
##
## Runas alias specification
##

##
## User privilege specification
##
root ALL=(ALL) ALL
marco ALL=(ALL) ALL
## Uncomment to allow members of group wheel to execute any command
# %wheel ALL=(ALL) ALL

## Same thing without a password
# %wheel ALL=(ALL) NOPASSWD: ALL

## Uncomment to allow members of group sudo to execute any command
%sudo   ALL=(ALL) ALL

## Uncomment to allow any user to run sudo if they know the password
## of the user they are running the command as (root by default).
-- INSERT --                                                  80,20         91%
Last but not least, we need to disable remote root login since we don’t need it anymore.
In order to do so, open the /etc/ssh/sshd_config file and set the PermiRootLogin
option back to no.
After that, restart the SSH daemon by running /etc/init.d/S50sshd restart.
That’s it! Here’s a picture of the final result: