How to Create Custom Linux Live ISOs
During one of my latest gigs, I had to perform data recovery and security analysis on machines from an ephemeral environment such as a live ISO. My first choice was to to rely on ready-to-use solutions such as GParted Live or fully-featured security distributions such as Kali Linux.
However, every time I booted into one of these systems, I ended up spending more time tuning the environment to fit my workflow and installing missing packages than actually getting work done. That’s when I discovered Debian’s live-build: a toolset for creating Debian-based live ISOs designed specifically to give maximum flexibility and to satisfy any kind of use-case.
In this guide we will see how to use this tool to craft a custom Linux live system from scratch. Do note that live-build supports
a lot of options and therefore I will only focus on the most essential settings rather than trying to cover every possible scenario. If you
need to configure something really exotic (like a custom kernel), you’d better read the official documentation.
Prerequisites
Before to begin, make sure to install the following package:
$ sudo apt install live-buildIf you aren’t running a Debian-based distribution, you could build the system inside a container.
The live-build tool depends on debootstrap and on other Debian-specific packages.
Next, let’s create a working directory and then let’s initialize the project structure:
$ mkdir ~/live-iso && cd ~/live-iso
$ lb config \
--distribution stable \
--architecture amd64 \
--debian-installer none \
--archive-areas "main contrib non-free non-free-firmware"
This will create the configuration files needed to bootstrap a stable x86_64 Debian system. The main contrib non-free non-free-firmware
archive areas will allow us to have access to the widest pool of available packages on the Debian repositories. These settings can be manually modified
by editing the config/bootstrap file.
Besides that, you should be aware of the following files under the configuration directory:
config/common: used to control basic settings such as the distribution name or apt’s recommended packages install policy (LB_APT_RECOMMENDS);config/binary: used to control the final ISO settings such as the bootloader types (for both BIOS and EFI systems), the kernel flags and other customizations for the final ISO file;config/package-lists/: where we will specify custom packages to install;config/includes.chroot: the overlay filesystem, the place where we’ll deploy our dotfiles;config/includes.binary: bootloader options, such as a custom setting file or custom logo.
Custom packages
Let’s start with something basic: packages. To specify which packages live-build should pull for us, let’s create a new file
called config/package-lists/desktop.list.chroot. You can specify another name as well, just make sure to keep the .list.chroot naming convention.
To install a lightweight desktop environment, you can specify the following packages:
# Base applications
xorg
xserver-xorg
xfce4
xfce4-terminal
xfce4-pulseaudio-plugin
xfce4-power-manager
brightnessctl
playerctl
lightdm
lightdm-gtk-greeter
network-manager
network-manager-gnome
elementary-xfce-icon-theme
firmware-linux
firefox-esr
According to my experiments, this is the bare minimum for a fully-functional graphical environment. You can specify as many packages as you wish here. Blank lines and comments get ignored.
Debconf pre-seeding
Many Debian packages require user interaction. Specifically, they prompt the user to select from multiple choices during the configuration phase
of the installation process. Since the live system bootstrap is completely non-interactive, we need to provide answers to such questions a priori.
This process is called pre-seeding Debian’s configuration database (debconf) and in order to do that in live-build, we need to create a file
under config/preseed.
As an example, suppose that we want to install Wireshark. This program prompts the user whether they want to allow non-root user to capture packets. That is:
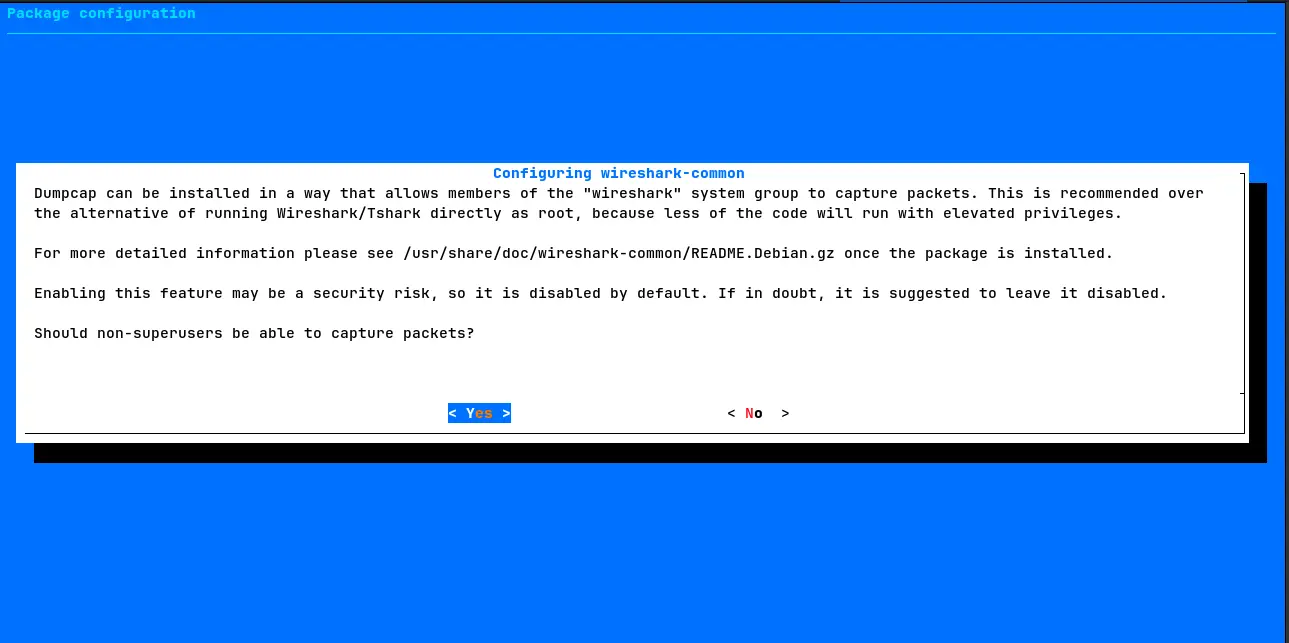
To choose yes non-interactively, we can create a new file called config/preseed/wireshark.cfg.chroot with the following content:
wireshark-common wireshark-common/install-setuid boolean trueObviously, you will need to know the package name, the configuration option and the available flags (in this case it’s just a boolean value).
Custom user groups
Another common scenario that you may encounter while configuring a live system is to specify which groups the default user (called “user”)
should be part of. On the previous section, for example, we’ve pre-seeded Wireshark to allow non-root users to capture packets. However, this will only
work if the non-root user is part of the wireshark group.
In order to do that, create a new file called config/includes.chroot/etc/live/config.conf.d/10-user-setup.conf with the following content:
LIVE_USER_DEFAULT_GROUPS="audio video wireshark"Just like before, you can add as many groups as you want.
Dotfiles
Let’s now move on to the most important part of the whole tutorial. In this section we will see how to customize the live system by providing our dotfiles
into the overlay file system specified under config/includes.chroot. This will allow us to customize every single aspect of the live system: from the wallpaper
to the terminal colorscheme, from the arrangement of the launchers on the XFCE4 panel to Firefox’s extensions.
Desktop environment
Before proceeding, I’d suggest you to spin up a VM running Debian and XFCE4 and then configure the theme, the icons and the launchers with instant
feedback. Once you did that, you can copy the ~/.config/xfce4 directory (from the VM) to config/includes.chroot/etc/skel/.config/xfce4
(on the live-build working directory). Here’s how this path should look:
config/includes.chroot/etc/skel/.config/xfce4
├── panel
│   ├── launcher-11
│   │   └── 17823033942.desktop
│   ├── launcher-12
│   │   └── 17823034053.desktop
│   └── launcher-13
│       └── 17823034194.desktop
└── xfconf
    └── xfce-perchannel-xml
        ├── displays.xml
        ├── thunar.xml
        ├── xfce4-desktop.xml
        ├── xfce4-keyboard-shortcuts.xml
        ├── xfce4-panel.xml
        ├── xfce4-settings-manager.xml
        ├── xfce4-terminal.xml
        ├── xfwm4.xml
        └── xsettings.xml
The xfce4-desktop.xml file controls the colorscheme and the icons of the whole DE, xfce4-terminal.xml defines the look and feel of the terminal
and xfce4-panel.xml manages the elements on the panel such as the launchers. Custom launchers must be defined on the
config/includes.chroot/etc/skel/.config/xfce4/panel directory as shown above. Again, configuring this graphically on a VM is way easier than editing XML files.
If you want to configure a custom wallpaper, you can do so by specifying one on the xfce4-desktop.xml file. Be sure to choose a generic path like the
one listed below rather than the home directory (which gets initialized during system boot):
<?xml version="1.1" encoding="UTF-8"?>
<channel name="xfce4-desktop" version="1.0">
  <property name="backdrop" type="empty">
    <property name="all-monitors" type="empty">
      <property name="workspace0" type="empty">
        <property name="last-image" type="string" value="/usr/share/backgrounds/wallpaper.jpg"/>
        <property name="image-style" type="int" value="5"/>
      </property>
    </property>
  </property>
</channel>
Then copy your wallpaper to config/includes.chroot/usr/share/backgrounds/wallpaper.jpg.
Firefox
Configuring Firefox is outside the scope of this tutorial. I will only show you how to
automatically install extensions. To do this, create a file called
config/includes.chroot/usr/share/firefox-esr/distribution/policies.json with the following content:
{
    "policies": {
        "Extensions": {
            "Install": [
                "https://addons.mozilla.org/firefox/downloads/latest/ublock-origin/latest.xpi",
                "https://addons.mozilla.org/firefox/downloads/latest/darkreader/darkreader.xpi"
            ]
        }
    }
}
On the first start, Firefox will automatically install the latest version of uBlock Origin and Dark Reader. To specify an extension, be sure to retrieve its unique name from the extension store.
System branding
Other dotfiles you may wish to provide are those needed to give some degree of branding to your live system. For instance, /etc/hostname,
/etc/issue and /etc/os-release, which is parsed by systemd to print the “Welcome to …” during the boot process.
All of them live under the /etc directory, therefore you can easily specify them under config/includes.chroot/etc.
Bootloader
The last thing we need to configure is the bootloader. By default, live-build uses syslinux for legacy BIOS-based systems and
grub for modern EFI-based machines. This configuration can be changed by editing the LB_BOOTLOADER_BIOS and LB_BOOTLOADER_EFI flags
under config/binary.
There, you can also change the kernel parameters by editing the LB_BOOTAPPEND_LIVE flag. For instance, you may want to remove
quiet splash to display the whole boot log at startup. Finally, LB_ISO_APPLICATION, LB_ISO_PREPARER and LB_ISO_PUBLISHER allow you to specify
the system’s author, “preparer” and publisher, respectively.
Last but not least, let’s spruce up the look of the bootloader’s splash screen by changing its background picture. By default, it looks like this:
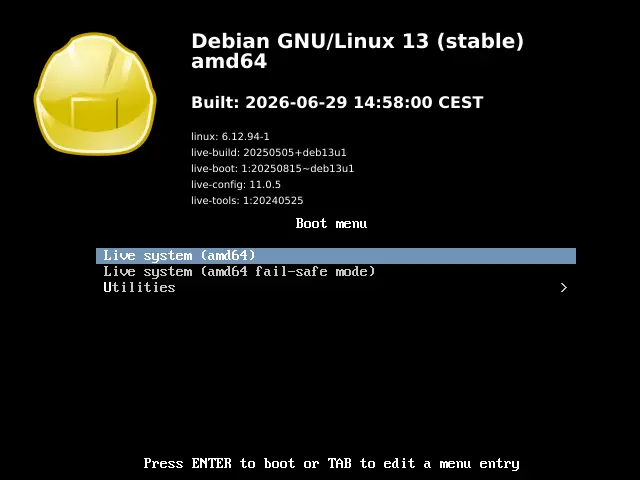
Not exactly a polished product…we can do better! Let’s create the following directory layout under config/:
config/includes.binary
├── boot
│   └── grub
│       └── grub.cfg
└── isolinux
    └── splash.png
Where config/includes.binary/isolinux/splash.png is a 640x480 PNG file for the legacy bootloader and config/includes.binary/boot/grub/grub.cfg
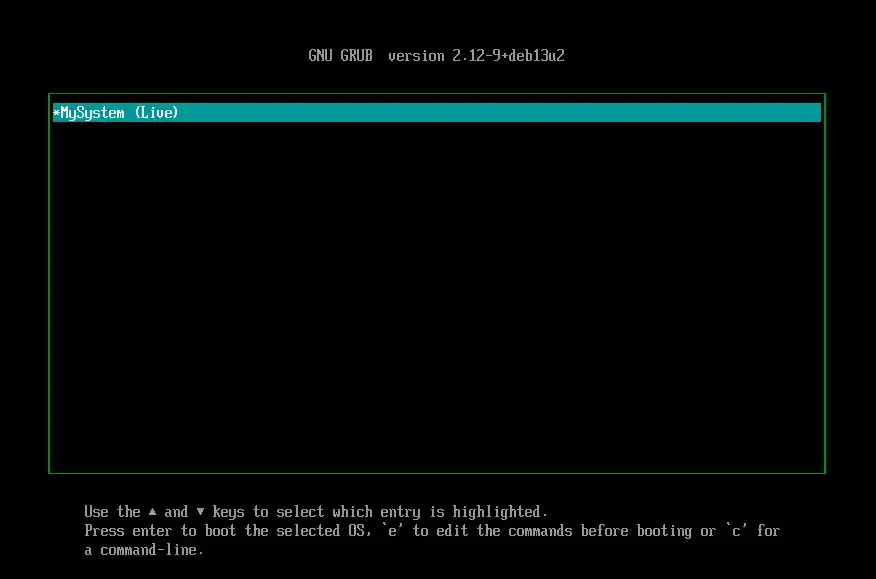
is a GRUB configuration file. You can configure the latter like so:
set timeout=5
set default=0

set menu_color_normal=green/black
set menu_color_highlight=white/cyan

menuentry "MySystem (Live)" {
    linux /live/vmlinuz boot=live components
    initrd /live/initrd.img
}
Which will render like this:
Building and Rebuilding
Once we’re satisfied with our configuration, we can let live-build do the heavy lifting for us. To do this, just issue the following command
from the parent directory (~/live-iso):
$ sudo lb buildYou should see an output like this:
The live-build script will build a live system by following these steps (approximately):
- Create a minimal Debian system using
debootstrap(8); - Install custom packages as well as system components needed to boot a live ISO;
- Apply patches and copy the overlay file system;
- Compress the file system using
mksquashfs(1); - Configure the bootloader(s);
- Create an ISO file using
xorriso(1).
Once done, you will find the ISO file on the same parent directory. The default naming convention is live-image-amd64.hybrid.iso.
The default login is user:live, though the system is configured for automatic login.
If you’re not satisfied on the first try and would like to tune further the system, you will happy to know that you do NOT have to start the whole process again. Rather, you can run one of the following commands:
$ sudo lb clean --cache  # removes the cache directories
$ sudo lb clean --chroot # unmounts and removes the chroot directory
$ sudo lb clean --binary # removes all binary related caches, files, directories, and stages files
$ sudo lb clean --purge  # removes everything, including all caches. The config directory is kept
Do note that none of these commands will remove your precious config/ directory and that before running # lb build again, you will need to
run $ lb config first (this time without flags because the configuration settings are already there).