How to Set Up a Git server using Gitea
In an age when your data is constantly being used to train LLMs, having a private and self-hosted alternative to host your personal repositories has become extremely important, especially if you use Git for more than just hosting open-source projects and you want to be 100% sure than your secret keys, sensitive documents and personal information are not used in the training process of some machine learning model. While migrating an entire infrastructure takes time, planning and multiple days (if not weeks) of effort, progressively moving your data off centralized platforms is an invaluable step towards data sovereignty and personal freedom.
In order to do this, we will deploy a self-hosted instance of Gitea: a private, fast, reliable DevOps platform (that's their current headline at the time of writing) using Docker, PostgreSQL and Gitea Act Runners to manage CI/CD pipelines. Furthermore, we will also try to customize the web interface aesthetic by changing the logo and the welcome screen on the homepage. If you want to see the final result, you can check out my personal Gitea instance to get an idea of what we'll accomplish.
Requirements
I've tested this tutorial on a VPS with 8GB of RAM and approximately 80GiB of storage; however, Gitea is know for being very lightweight. You can probably run it on any spare computer you've got at home or on that old Raspberry Pi buried on the bottom of a drawer.
Base Configuration
Let's start by creating a working directory to store the Docker configuration file and the data directories:
Inside it, let's create a new file called compose.yml with the following two services:
Be sure to change the values that I've flagged with a comment. In particular, this configuration binds the following two ports on localhost:
| Address | Port | Meaning |
|---|---|---|
127.0.0.1 |
3000 | Gitea listening port |
127.0.0.1 |
2222 | Builtin SSH server |
As you can see, I've specified a different SSH port for the Gitea builtin SSH server in order to avoid conflicts with
the host SSH server. Of course, if your host uses a different SSH port, you can safely bind port 22 on both
the guest and the host without worrying about port conflicts. Besides this, port 3000 is used by Gitea to serve the web interface (again, you can change this as well).
Reverse Proxy
Before deploying the containers, we will configure a web server to act as a reverse proxy. Below, you can find a sample configuration for the most popular HTTP servers available right now (my favorite first):
Caddy
NGINX
Apache
Deploy
Let's now deploy the infrastructure by issuing the following command:
You should see the following output:

After that, docker compose ps should yield the following status:
Additionally, you should have the following directories on your local path:
The gitea/gitea directory will store the Gitea configuration files as well as the templates, the themes and the icons.
We will come back there later to customize our server. The gitea/git path is where Gitea stores the actual bare
repositories, while the postgres directory is where PostgreSQL saves its data.
Installation
Right now the infrastructure is up and running but we have yet have to install Gitea. To do this, open your web browser,
go to https://git.<YOUR_DOMAIN>.com (or whatever you've chosen) and follow these instructions:
Database settings
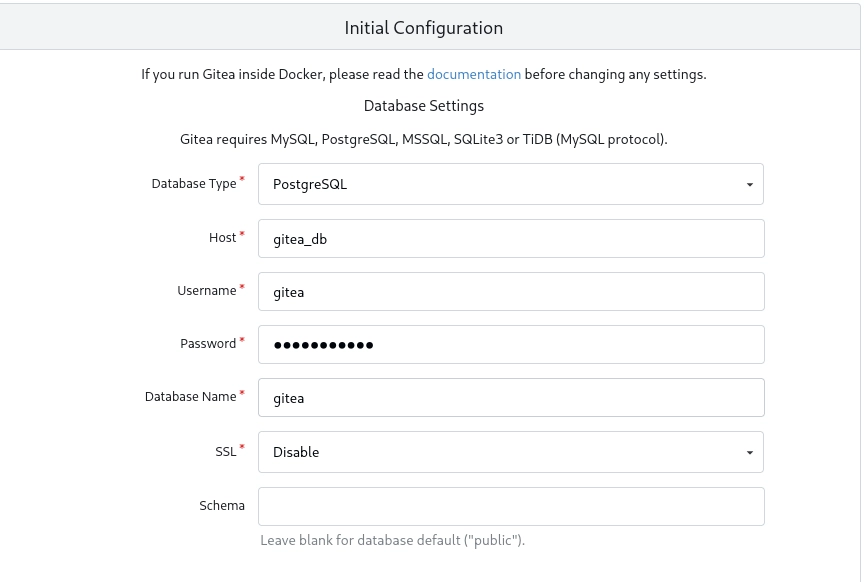
Be sure to choose "PostgreSQL" as the database type and to set gitea_db (the name of the database container) as
the host value. Finally, set the username and the password accordingly.
General settings
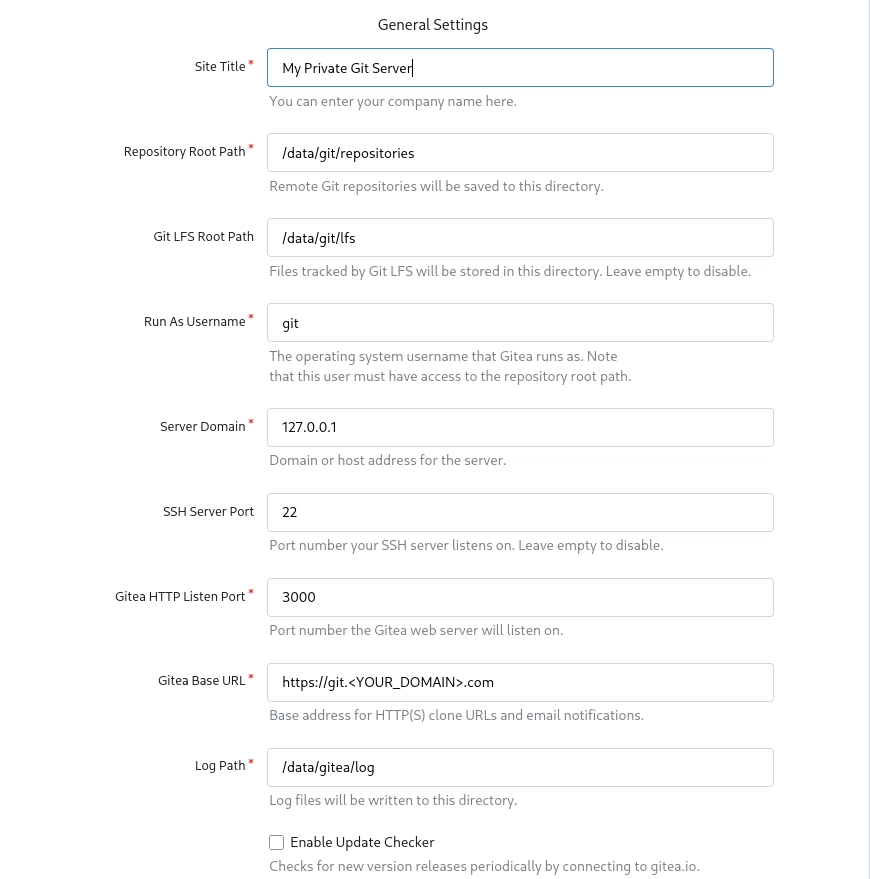
The only thing that you need to change from this section is the "Gitea Base URL" and the "Site Title". Be also sure to set up a admin account from the collapsed "Admin Account Settings".
After that, click the "Install Gitea" button and wait for the installer to complete, you should see the following loading screen:

Advanced Configuration
Let's now configure our brand new Git server from the web interface. Gitea provides a lot of settings, so we will only cover the most important ones.
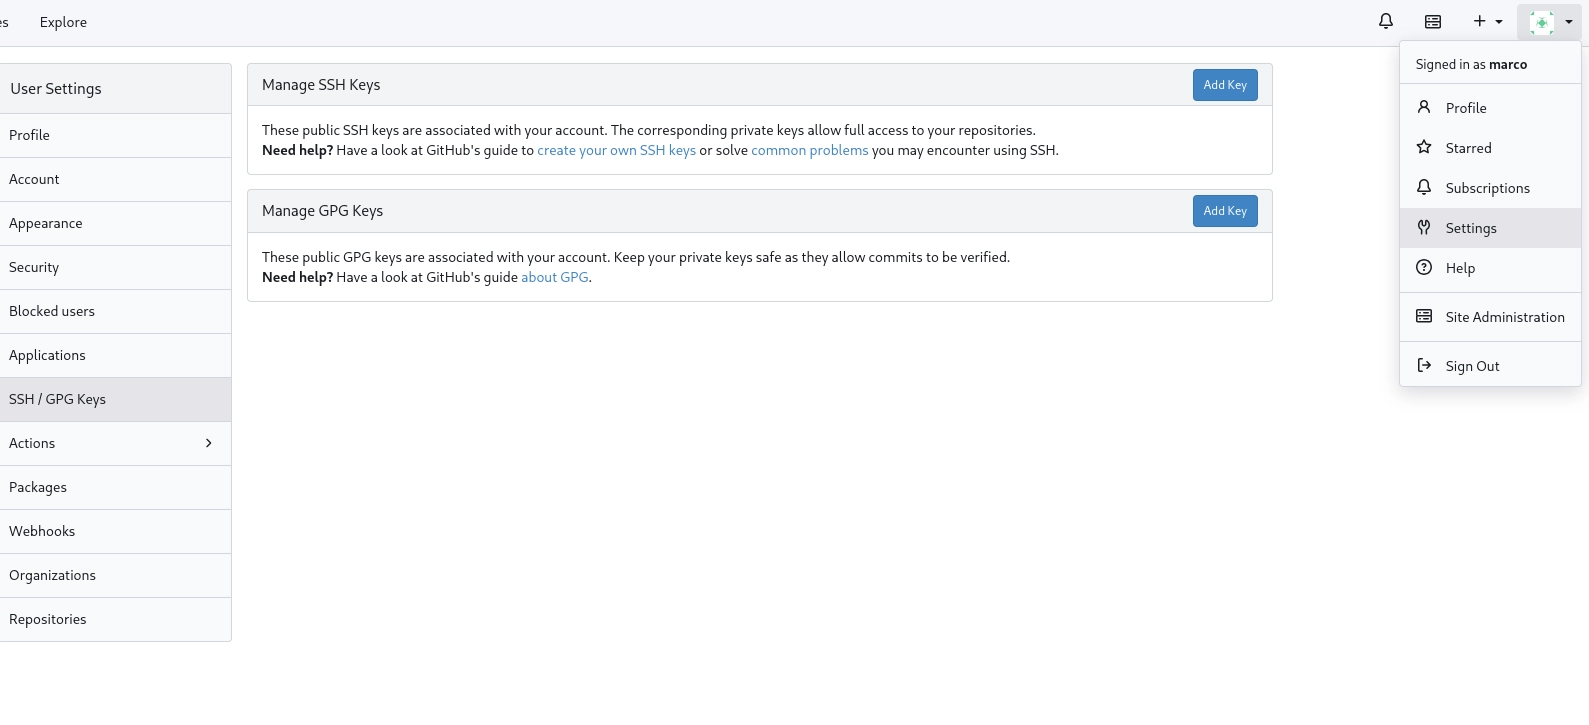
SSH / GPG keys
In order to add your SSH and GPG keys, go to the top-right profile picture, click on "Settings" and then on "GPG Keys" menu from the left pane.
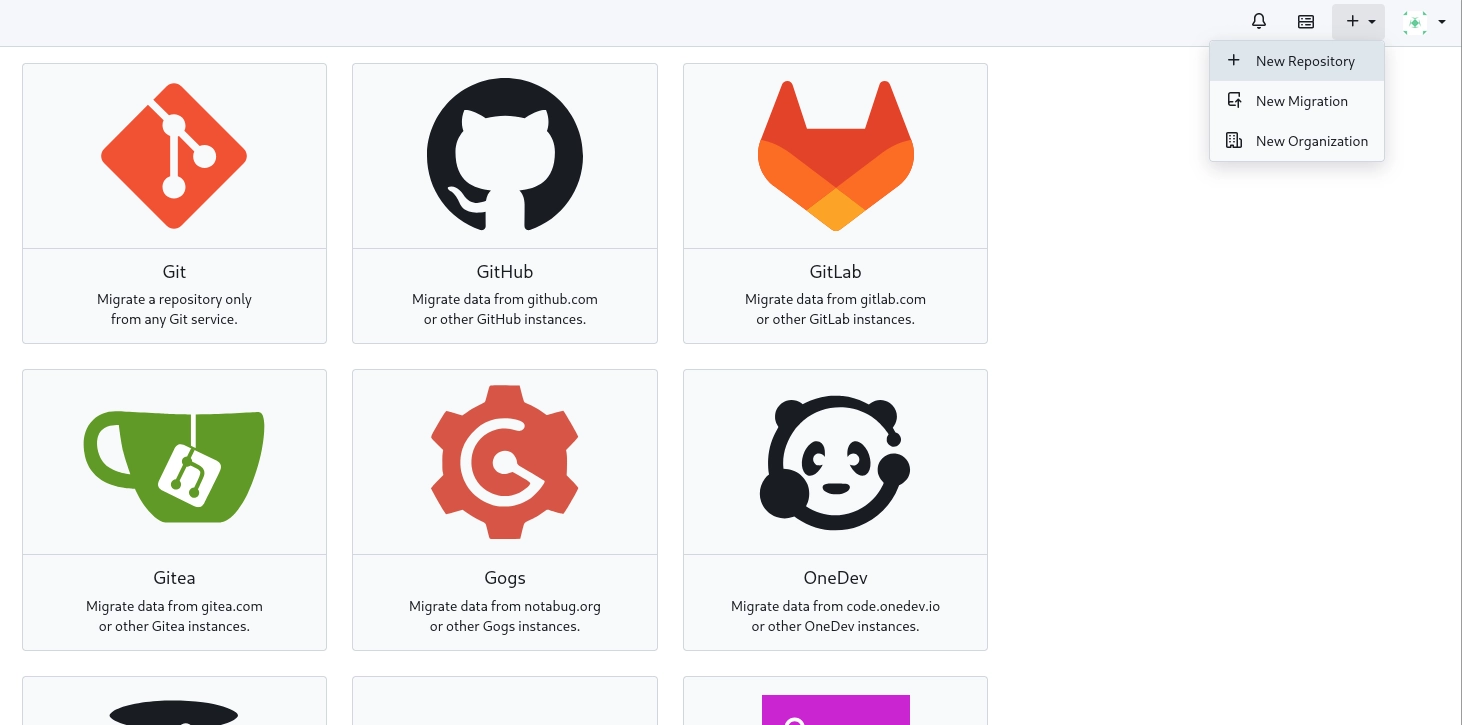
Repository migration
To migrate repositories from another Git platform (such as GitHub, GitLab, etc.), go to the top-right "plus symbol", click on "New Repository", then "migrate repository". From there, you can easily transfer your existing repository following the interactive interface.
Gitea Runner
Gitea doesn't support CI/CD pipelines out of the box. To do this, you will need to set up an additional component called Gitea Runner. The good news is that it's extremely lightweight, simple to set up and can be integrated seamlessly with our existing Docker Compose set up. Let's see how.
Let's start by retrieving the "Registration Token". To do this, go to:
From there, click on "Create new Runner" and copy the token to your clipboard. After that, let's
modify the compose.yml file by appending the following service at the bottom:
Be sure to replace these values with the appropriate value:
GITEA_INSTANCE_URL: the domain of the Gitea instance. You can also use Docker container name (i.e.,http://gitea_base:3000);GITEA_RUNNER_REGISTRATION_TOKEN: the token copied on your clipboard from before;GITEA_RUNNER_NAME: a generic name;GITEA_RUNNER_LABELS: used to determine which jobs the runner can execute.
In particular, the GITEA_RUNNER_LABELS should be formatted using the following syntax:
In the given example, we have defined a label called ubuntu-latest which is mapped to a Docker image
called runner-images:ubuntu-latest from the docker.gitea.com OCI registry. This will allow us to use the following
setting inside workflow files:
Let's now restart the whole infrastructure:
As you can see from the logs, the registration process was successful! If you now go back to the web interface, you should see a new Runner correctly registered and waiting for new jobs.
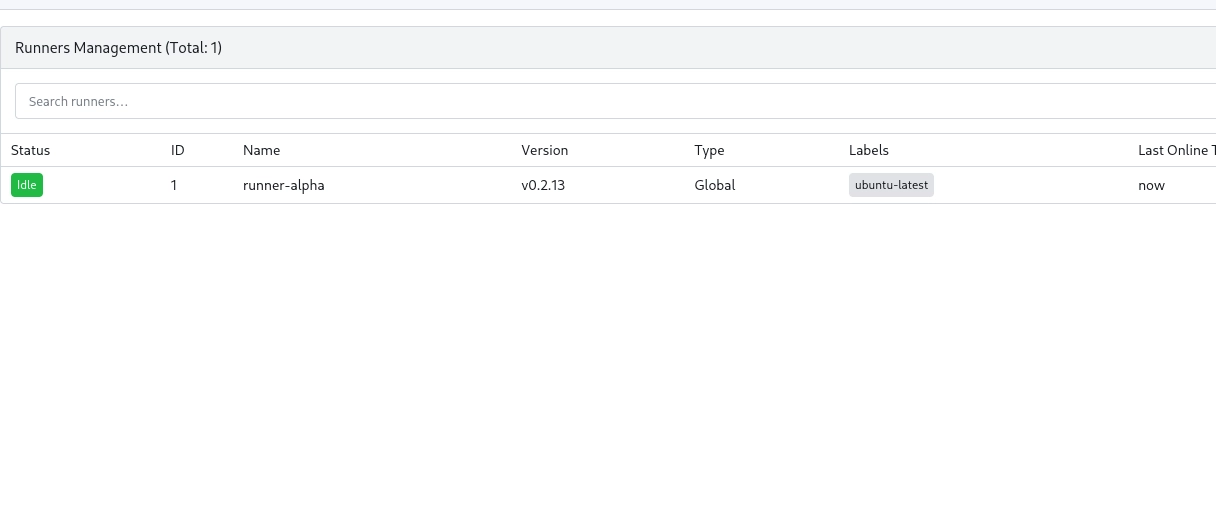
Now, every time you push a new commit on a repository configured for CI/CD, the Runner called runner-alpha should pick
up the request and execute the steps of the jobs. You can try to go to one of my repository to see such setup in production.
Customization
Gitea provides an overlay system that allows you to customize pretty much every single aspect of the web interface, let it be the logo, the homepage, the header or the footer. To keep this guide small and bearable, we will only cover the logo and the homepage customization, but you can easily adapt the following instructions to change other details as well.
Let's start with the logo. To do this, you will need to provide standard logo image and a favicon icon, both in SVG format.
To install them, create the following directories inside the gitea/ path and then copy there the SVG files mentioned before:
Be sure to restart the infrastructure and to force-reload the page (CTRL+F5) to discard the browser cache. In order to customize the welcome screen, instead, create the following directories:
Then, create a file there called home.tmpl with the following content:
Restart the containers once again and you should get something like this:
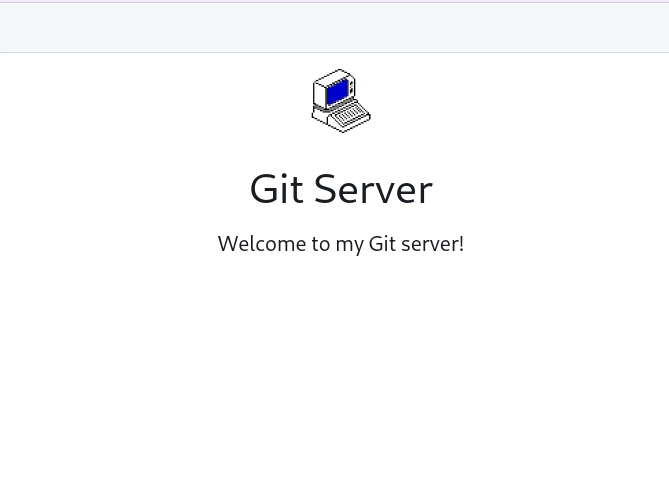
Of course this is just an example and you can style it however you want.
Conclusions
You should now have a fully working Gitea server with CI/CD support ready to host your personal projects. Try to dive into the web interface to discover all the available settings.
In the meanwhile, I will try to keep this guide as updated as possible with the latest updates. Let me know if you spot any kind of issue. 🙃👋