HOW TO SAVE YAMAHA DX PATCHES TO YOUR COMPUTER
2023-07-08

The Problem
If you own a Yamaha Reface synthesizer, you already know how great these little machines can be. Lightweight, portable and versatile, they are the perfect instruments to play in your free time or when you don't want to spend the whole evening in your home studio.As a longtime fan of FM synthesis, the Reface DX is hands down my all-time favorite: with an internal patch memory and a backlight LCD, the DX is easily the most versatile of the whole Reface serie. Yet, it has a minor inconvenient: you cannot export patches to your computer! The only way to backup the internal memory of your synth is to upload the patches on Yamaha's website Soundmondo, which is cool if you want to share your creations with the community but fails to address the core reason of why I want to backup the internal banks in the first place: "what if Soundmondo gets discontinued?"
Losing access to Soundmondo would mean losing your whole patch library, that doesn't sound good, right? Luckily for us, there are some workarounds.
1st Solution: A Notebook
The first workaround is to just annotate the parameters of each patch in a template or, as I did below for the Reface CS, in a notebook. This was the approach sound engineers used back in the days of modular synthesizers, when they didn't had any kind of internal patch memory. But of course this method isn't suitable for FM synthesizers where you have tons of parameters per operator.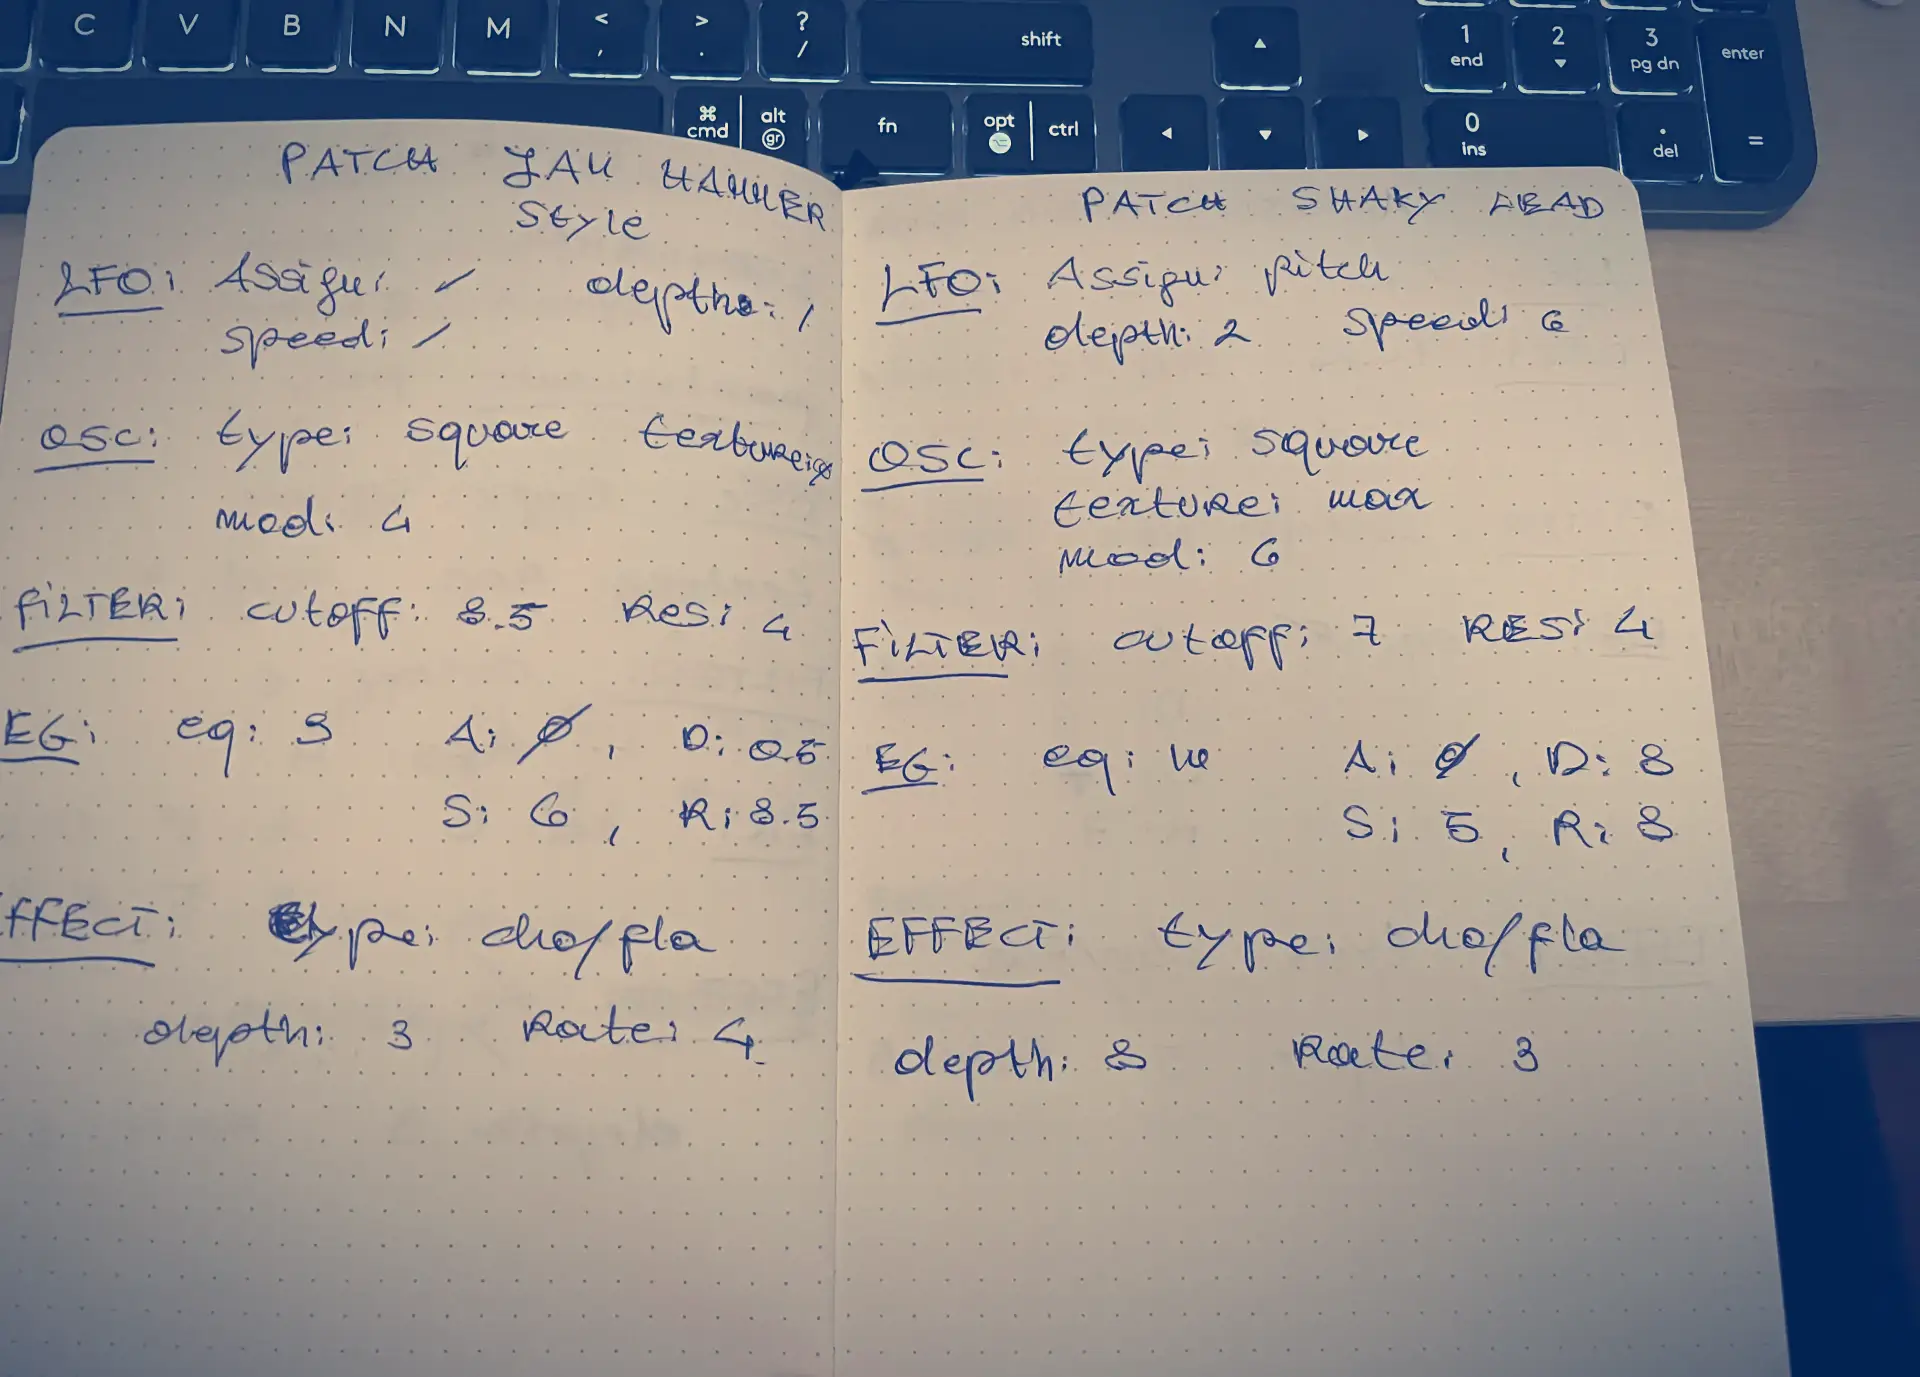
2nd Solution: A SysEX MIDI editor
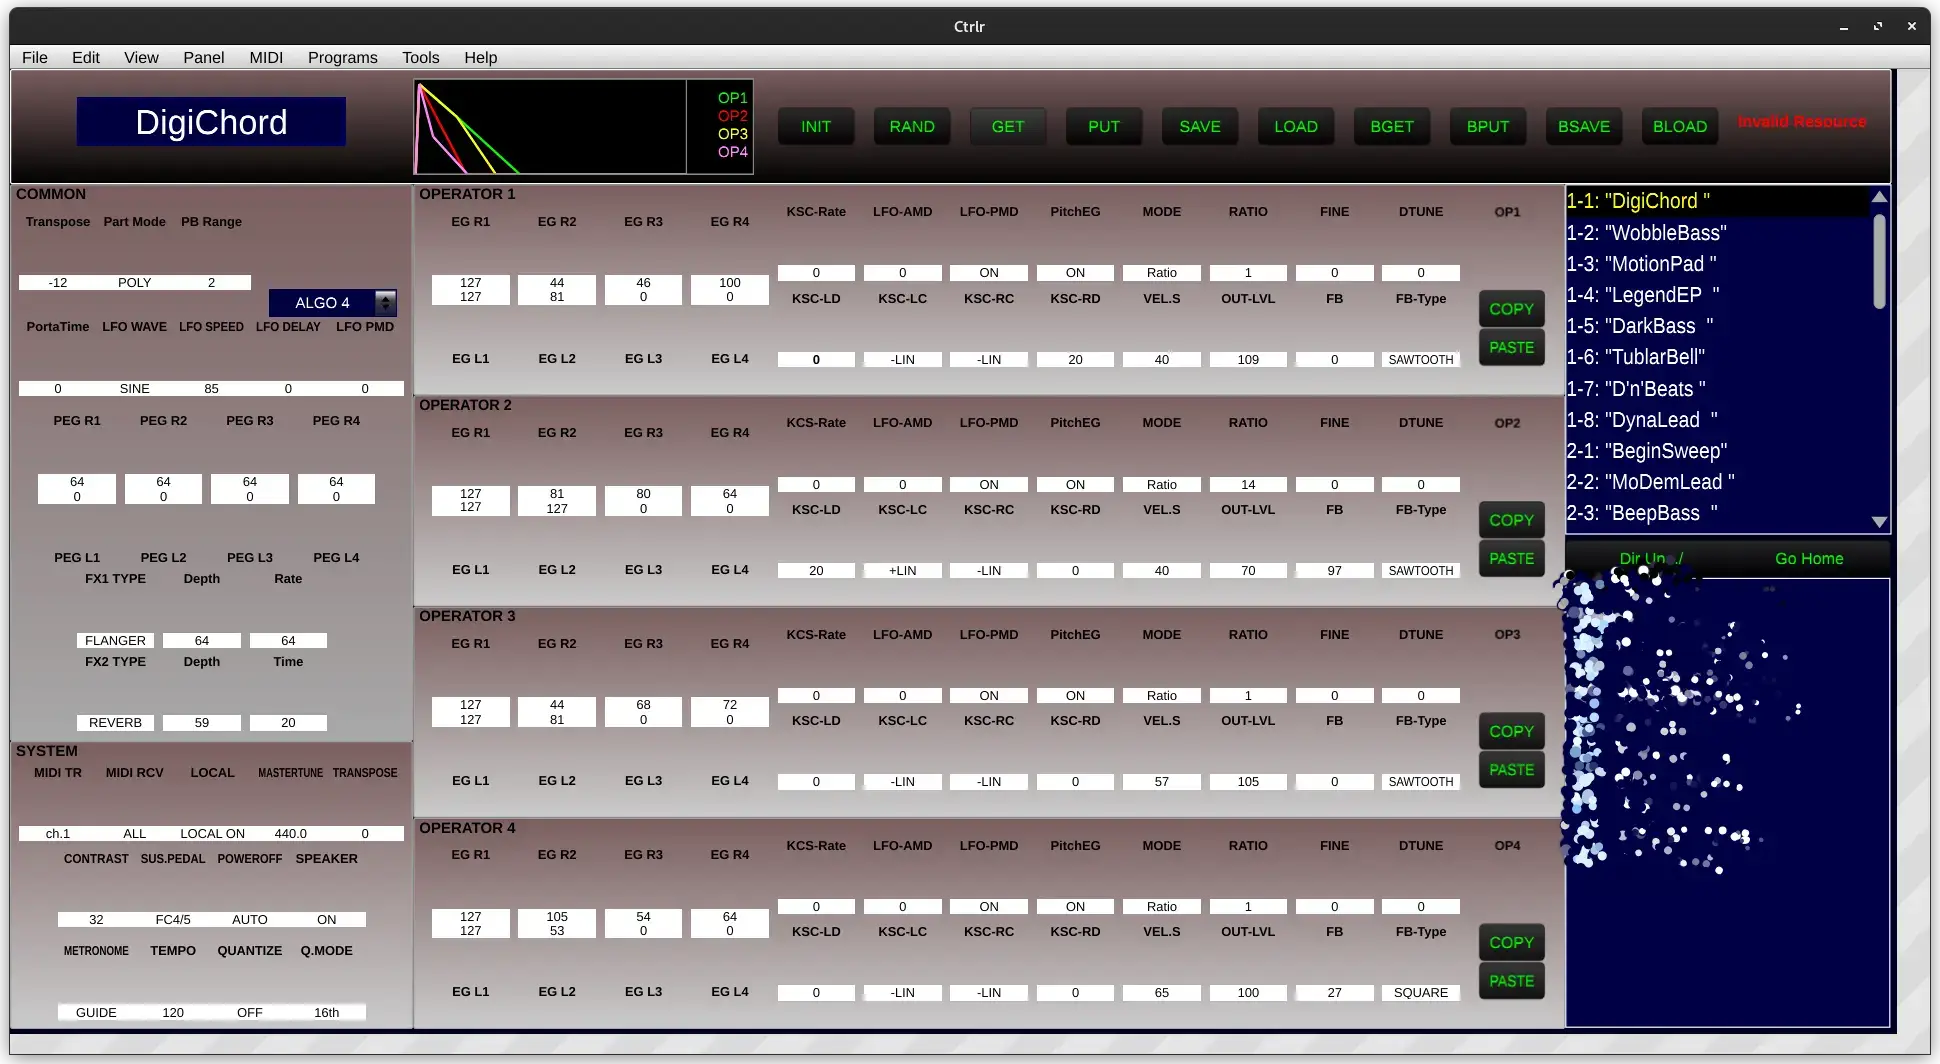
The other solution is to use a SysEX MIDI editor to dump the memory of the synth to your computer. With this approach you can easily download/upload banks directly from your computer without using any official client. Furthermore, you can use a MIDI editor to program a patch from scratch without having to messing around with the instrument menu.There are quite a few of this kind of program available for free and since they are universal, it doesn't really matter which one you choose. In this tutorial I will use Ctrl which is free, open source and works in the three major operating systems(Windows, Mac OS, Linux). Beside this, you will also need a panel(i.e., the skin of the synth you are trying to manage) for the Reface DX. You can find an updated version of the panel on this website.
Let us start by connecting the hardware to our computer using the USB cable. We can check whether the connection has been established successfully using the following command:
marco@debtop $> amidi -l
Dir Device    Name
IO  hw:2,0,0  reface DX MIDI 1
After that we can open Ctrl, go to File -> Open Panel and select the
refacedx-20230511.bpanelz file. You should have the following interface:
 Now go to
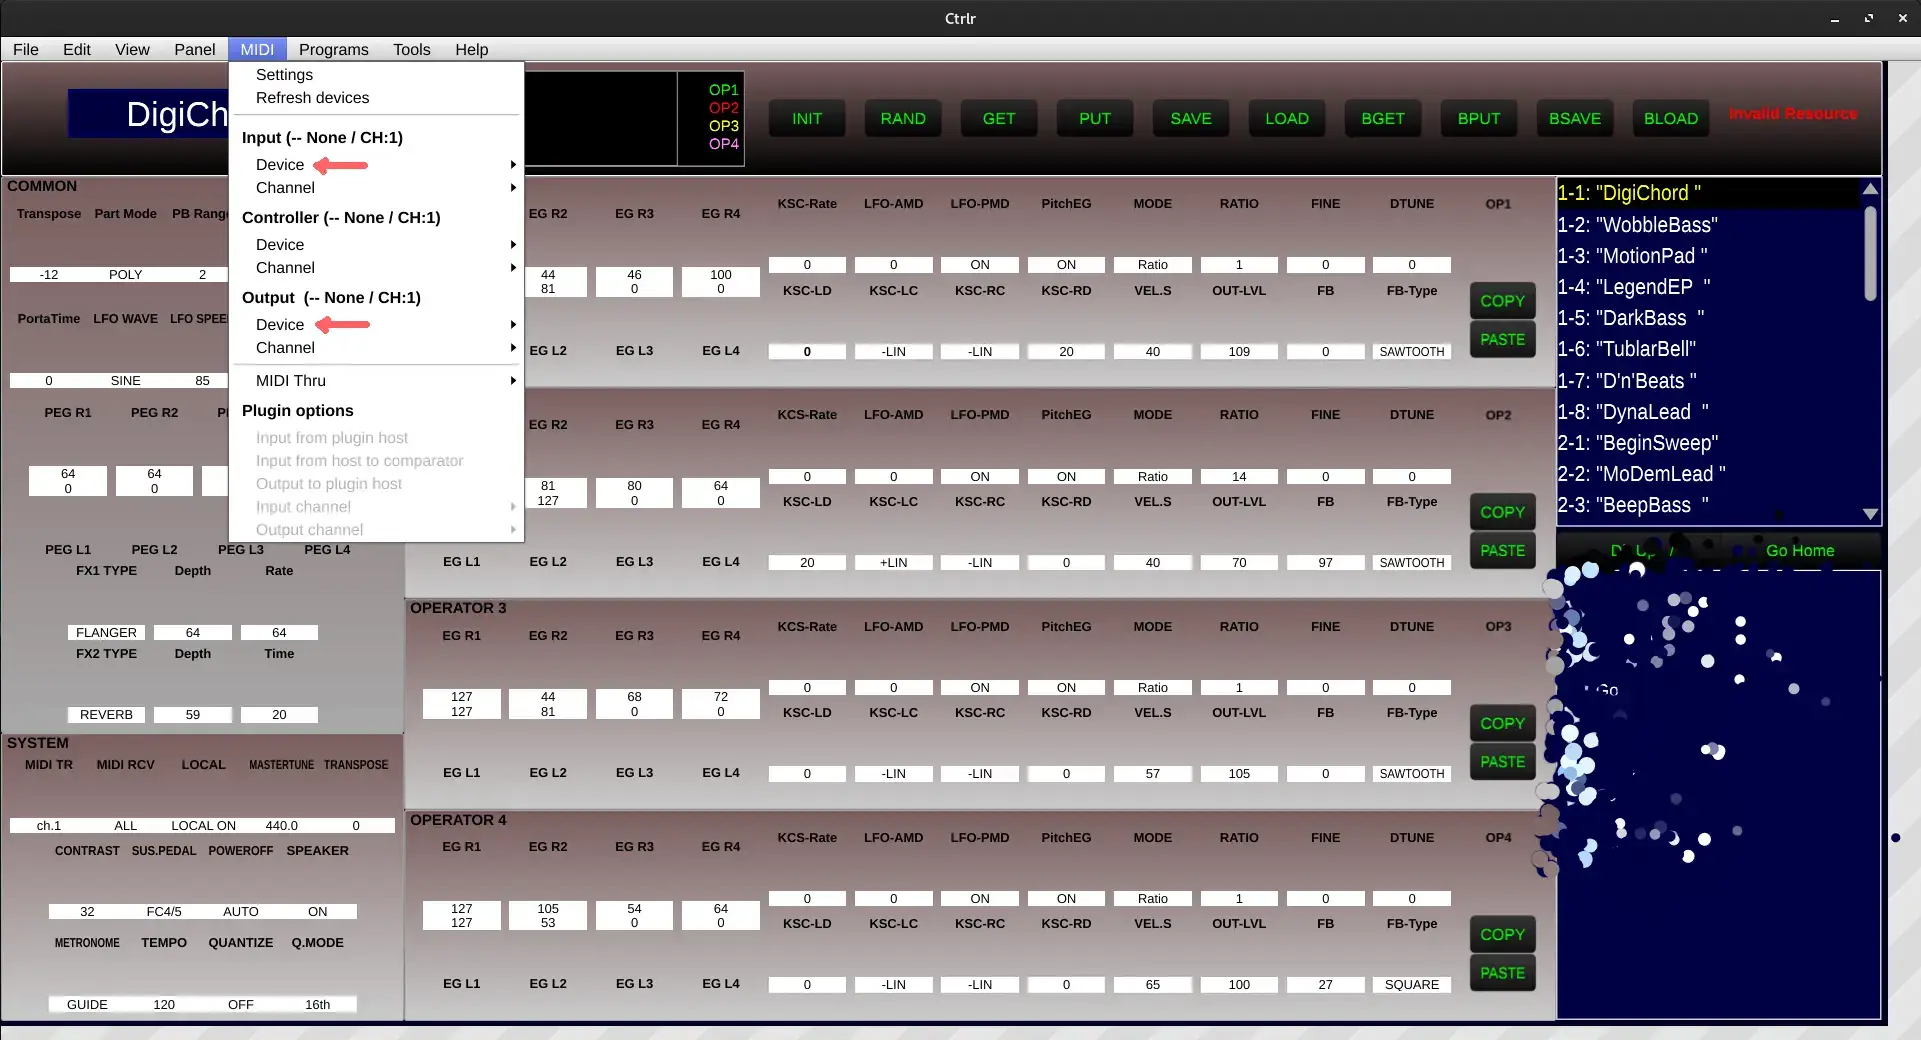
 Midi and select the Reface DX from both input and output sections:
 Finally, we can retrieve the synth memory by pressing the
 BGET(Bank Get) button. The patches
will be displayed on the right-side panel of the window. To save the patches on your computer press the
BSAVE(Bank Save) button, a dialog will ask you the path and the name of the backup file. After doing
so, press "save". The backup file consists in a plain old SysEX message file that you can move wherever you want:
marco@debtop $> file BANKS_REFACE_DX.syx
BANKS_REFACE_DX.syx: MIDI audio System Exclusive (SysEx) message - Yamaha, at 12 EOX
Restore A Backup
Let us now see how to restore a backup using a SysEX MIDI editor. First of all, open Ctrl again, load the panel and establish a connection to the synthesizer as described in the previous section. Then load the local SysEX file using theBLOAD button; Again, the patches will be displayed on the right-side panel of the program. At this point,
click on the BPUT button to send the banks to the instrument.
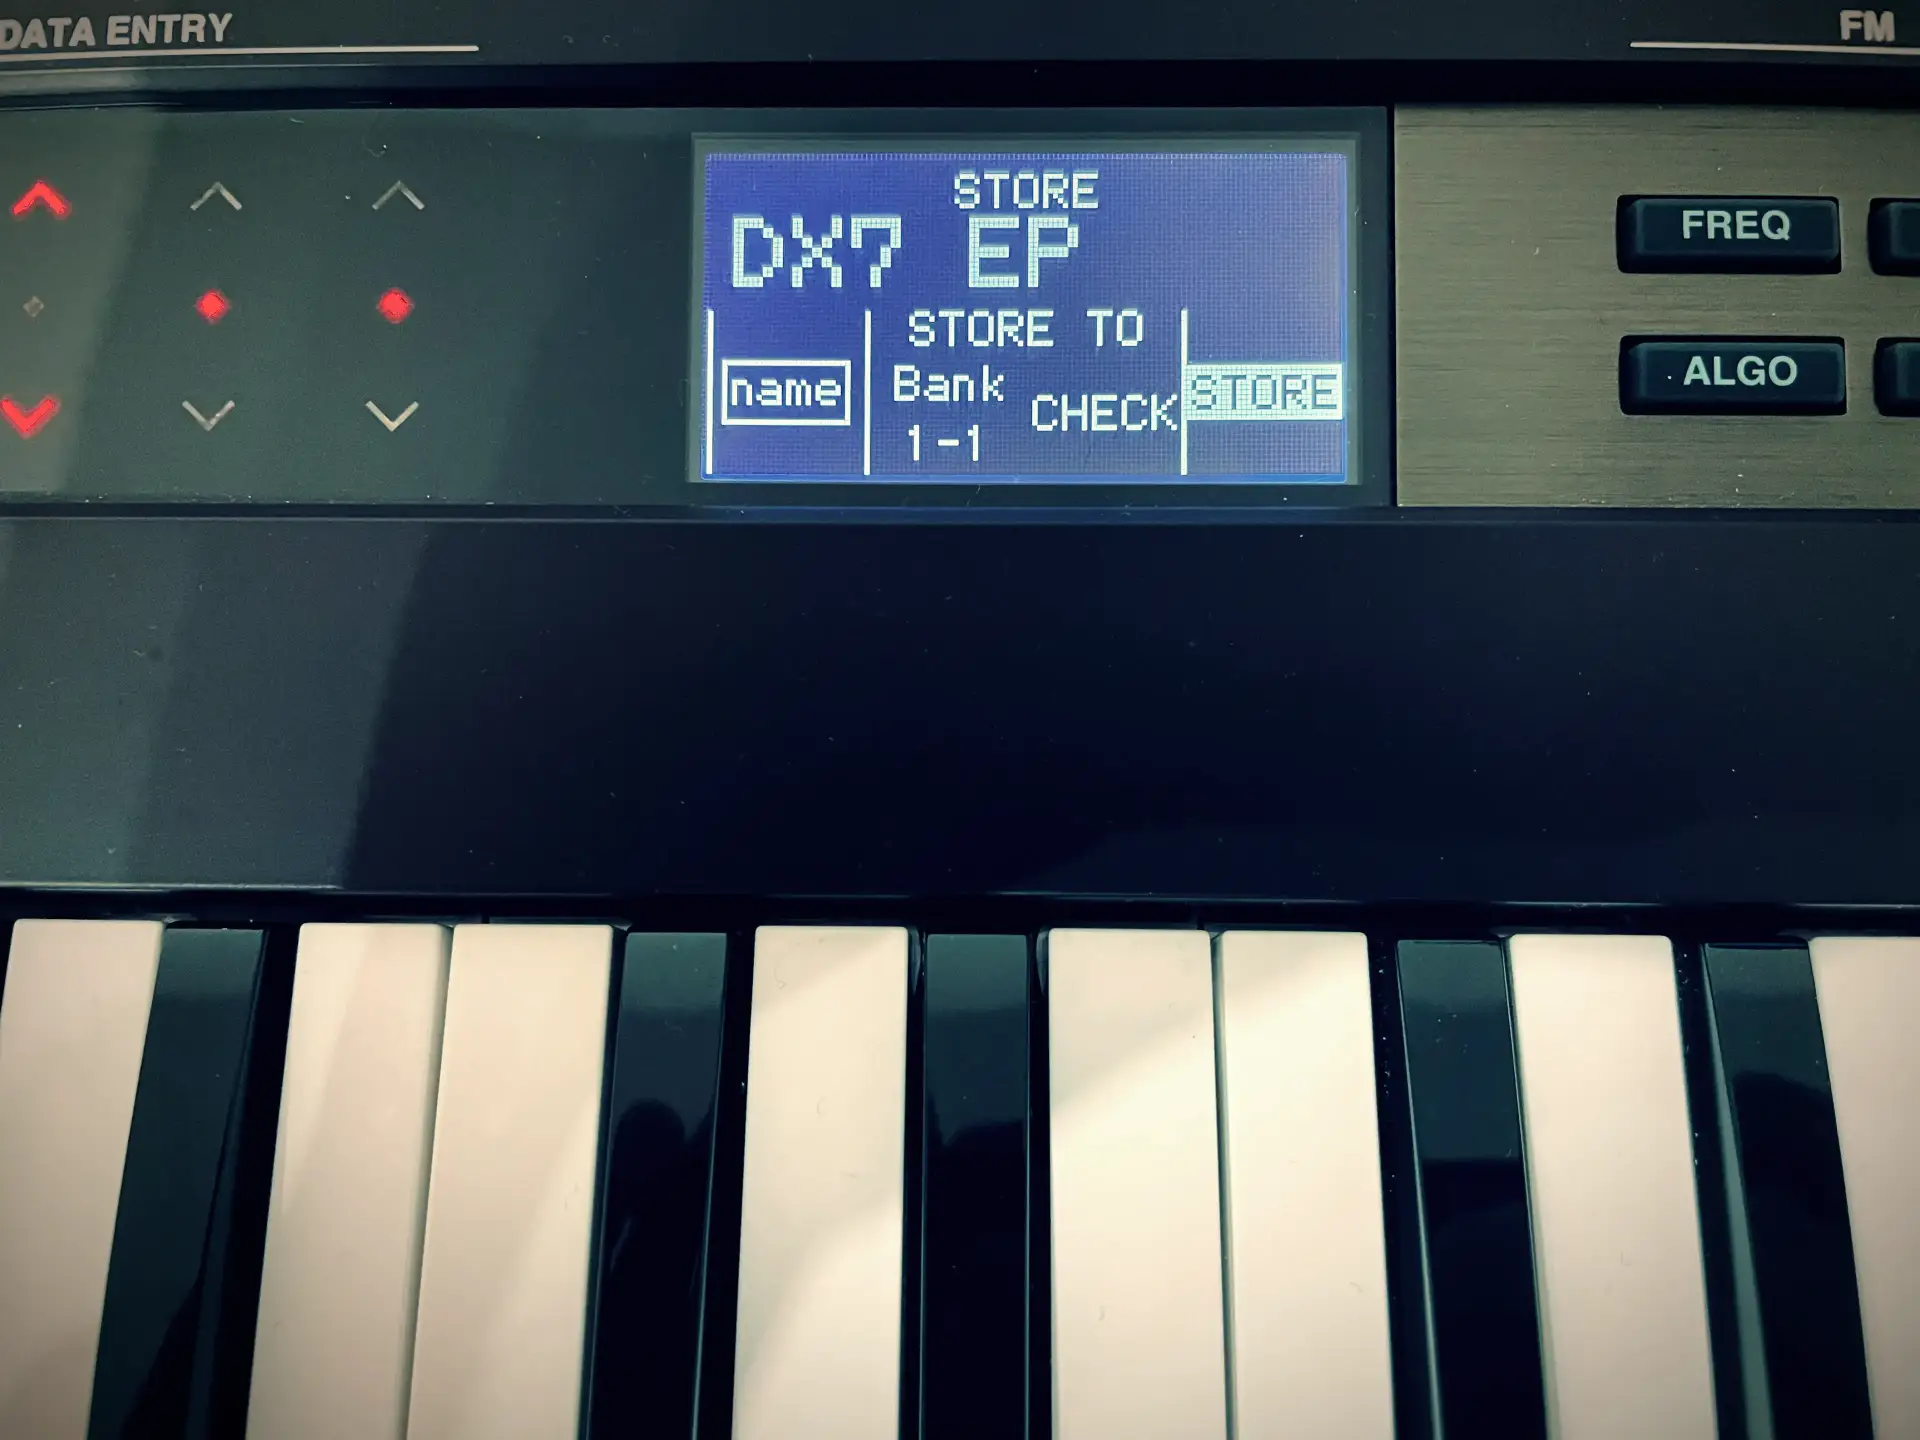
At this stage the patches are loaded BUT not saved on your synthesizer. This means that before doing anything else, you need to press the
STORE button on your synthesizer and overwrite the internal memory:
 After that your backup will be successfully restored. You can enjoy your instrument without relying on Soundmondo anymore!
Do note that this action will overwrite all the patches(not just the current one), so you do not need to repeat this procedure for each patch of every bank.