Configure a Wireguard VPN with PiHole

In this guide, we will outline the process of installing and configuring a Wireguard VPN integrated with Pi-Hole for DNS level ad blocking. The resulting network will effectively block advertisements, which is particularly useful on mobile phones or on any platform where ad blockers cannot be traditionally installed.
Before proceeding, be sure to have an updated installation of Debian and some familiarity with UNIX systems.
Installation
Let's start by installing the wireguard package which contains the tools needed to
configure the VPN:
Server configuration
We can now start configuring the server by generating a key pair and a configuration file
under the /etc/wireguard directory:
After that, let's copy the content of the privkey file and add it to the VPN configuration
file (wg0.conf):
Where:
PrivateKeycontains the content of theprivkeyfile;Addressis the CIDR of the VPN (i.e., from192.168.2.1to192.168.2.254);ListenPortis the UDP port where the Wireguard server will listen to.
Configure the firewall
The next step is to configure the firewall to allow incoming traffic on the selected UDP port
and to set up network address translation (NAT) for the Wireguard interface (wg0). To keep
the configuration as straightforward as possible, we will use nftables; however, the same
result can be achieved with virtually any netfilter front-end of your choice. By default,
on Debian systems, an empty nftables ruleset appears as follows:
Let's modify it as follows:
After that, reload the rulset by issuing the following command:
Enable IP forwarding
After having configured the firewall, we can now proceed to enabling the kernel feature known as ip forwarding:
To make it permanent across reboots, add the following line to the /etc/sysctl.d/99-sysctl.conf
configuration file:
Configure the client
Let's now add a new client to the network. Create a new configuration file on your client with the following content:
Be sure to replace the following fields according to your configuration:
PrivateKey: replace it with the client private key;PublicKey: replace it with the server public key;PresharedKey: optional field, you can generate a pre-shared key withwg genpsk;Endpoint: replace it with the IP address of the VPN with its UDP port.
Add the client to the server
We are now ready to add the client to the server configuration file. To do so, let's edit
again the /etc/wireguard/wg0.conf (on the server) by adding the following content:
Where:
PublicKeyis the public key of the client;PresharedKeyis the preshared key we've generated before;AllowedIPsis the client IP address.
After that, let's start the VPN server:
You can now enable the VPN interface on your client as well. Keep in mind
that you won't be able to reach most of the Internet, though. This is because
the DNS server we've specified in the configuration file (192.168.2.1) is not yet
active. We will configure it in the next section.
Configure PiHole
PiHole is an internet tracking blocking system that acts as a DNS sinkhole. It is designed primarily for the RaspberryPi but it can also be easily installed in any other Linux-based distribution. Since PiHole creates quite a lot of configuration files (such as the DNS resolver, the lighttpd web server and the AdminLTE dashboard) and since we don't want to pollute our system, we will install it through Docker. This approach offers the additional advantage of simplifying the update process
Installing Docker on Debian is outside the scope of this guide and therefore will not be covered
here. If you need help, refer to the official documentation. Once you have Docker installed,
create a new compose.yml file with the following content:
Be sure to replace the FTLCONF_webserver_api_password with a proper password. After that, start
the container using
You can then verify whether the container has started by issuing docker-compose ps:
After that, open up your browser and go to the PiHole admin page. You should see a screen see a page like the following:

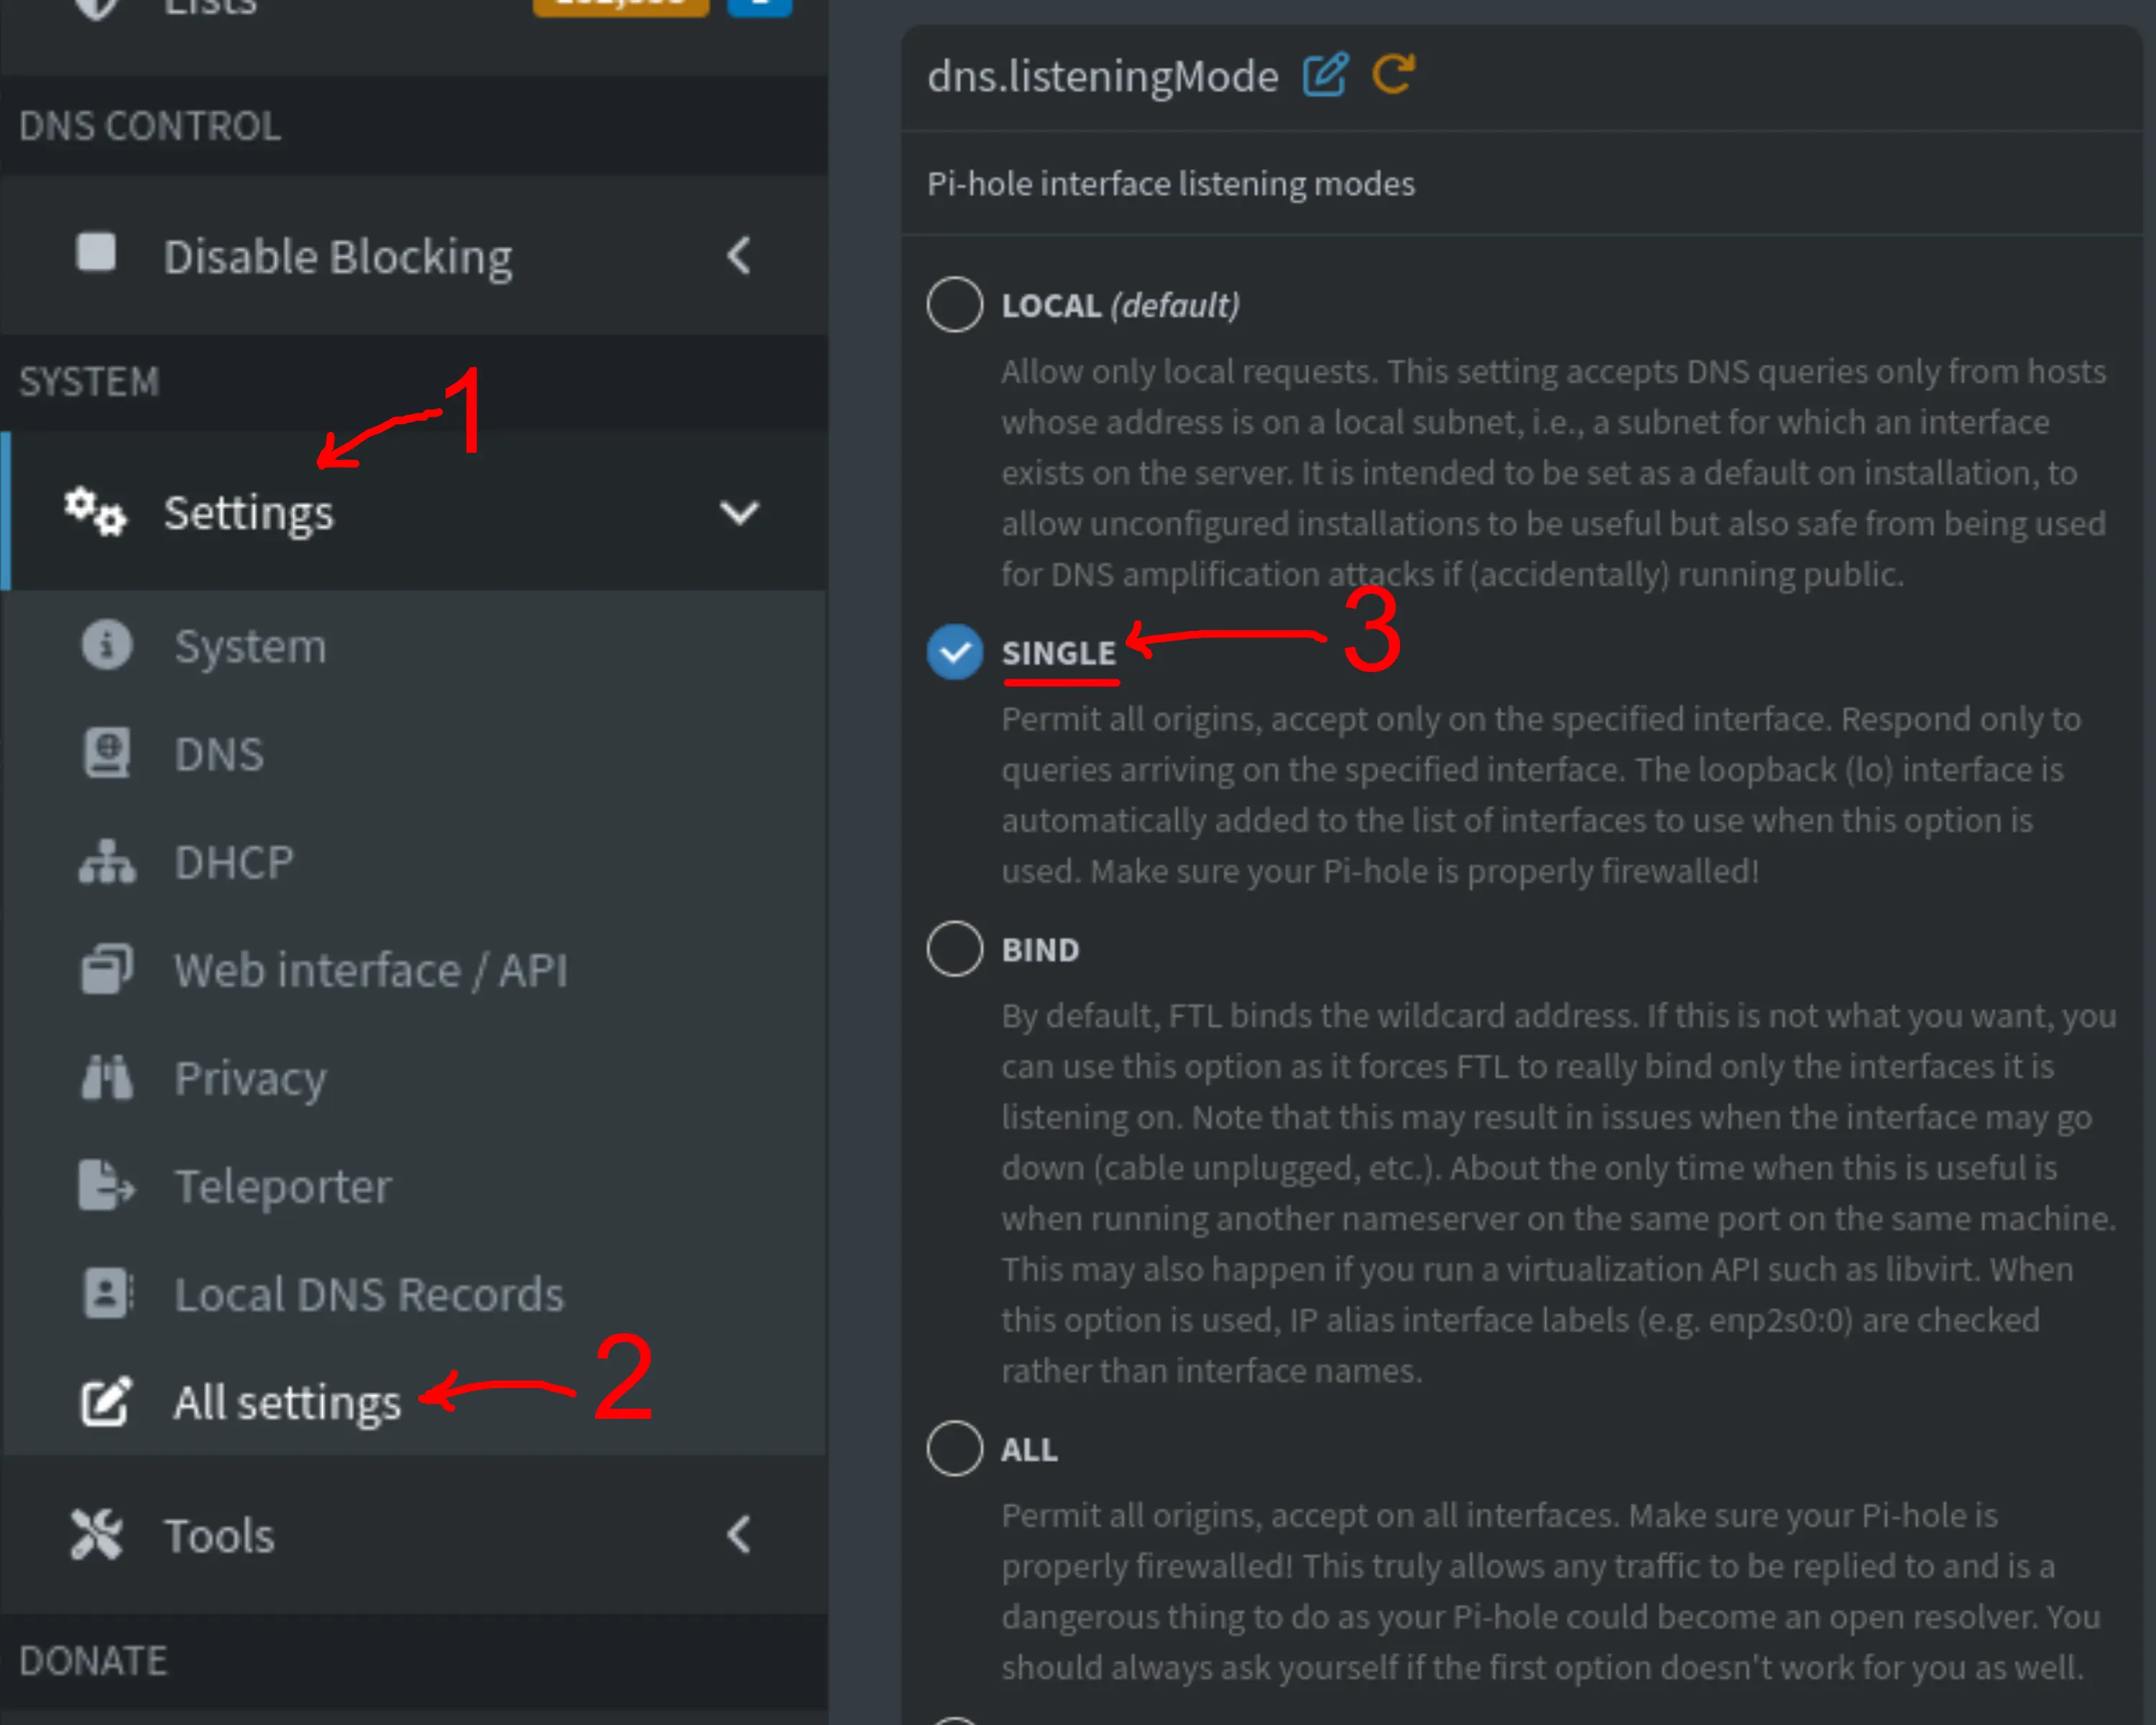
Enter your admin password and follow these instructions:
- Open the "Settings" drop-down menu from the left pane;
- Click on "All settings';
- Scroll down to
dns.listeningModeand select theSINGLEoption; - Click on the "Save & Apply" button on the bottom right corner.
Conclusions
You should now be able to reach the Internet. You can also try whether the VPN works by visiting one of the following websites:
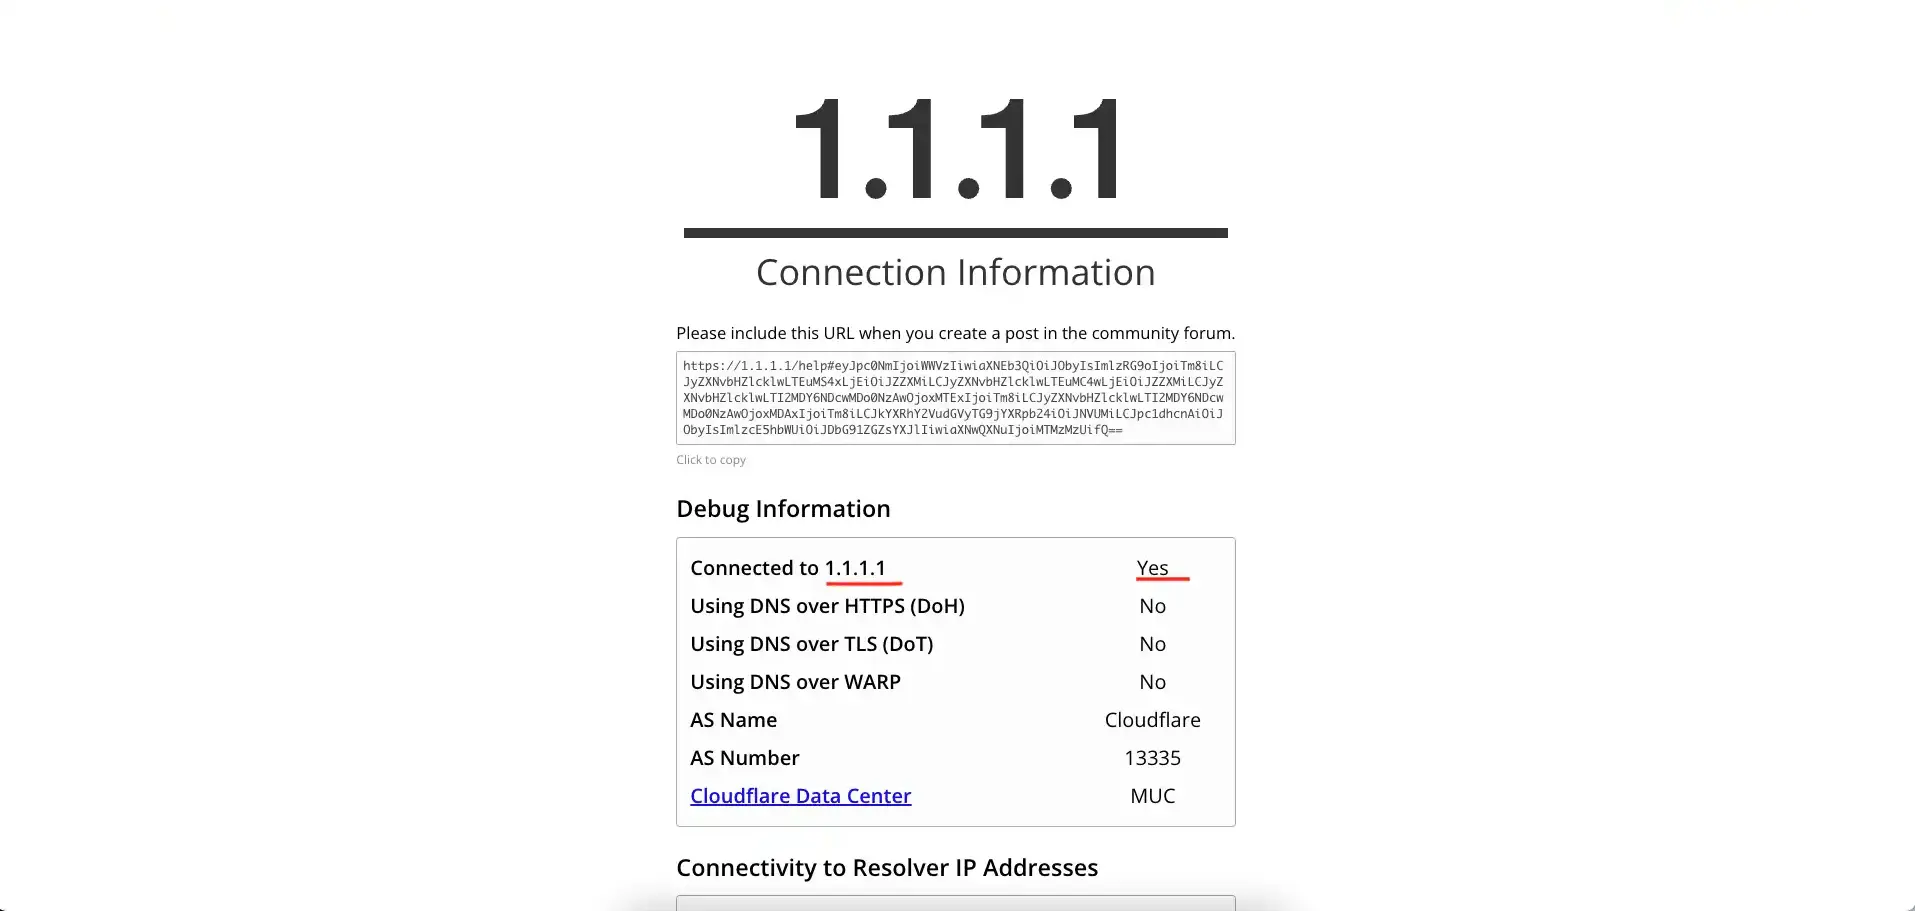
1.1.1.1/help
Go to this page if you're using the Cloudflare DNS. It will show you various information about the type of connection.
blockads.fivefilters.org
This page checks whether the ad-blocking system is working.

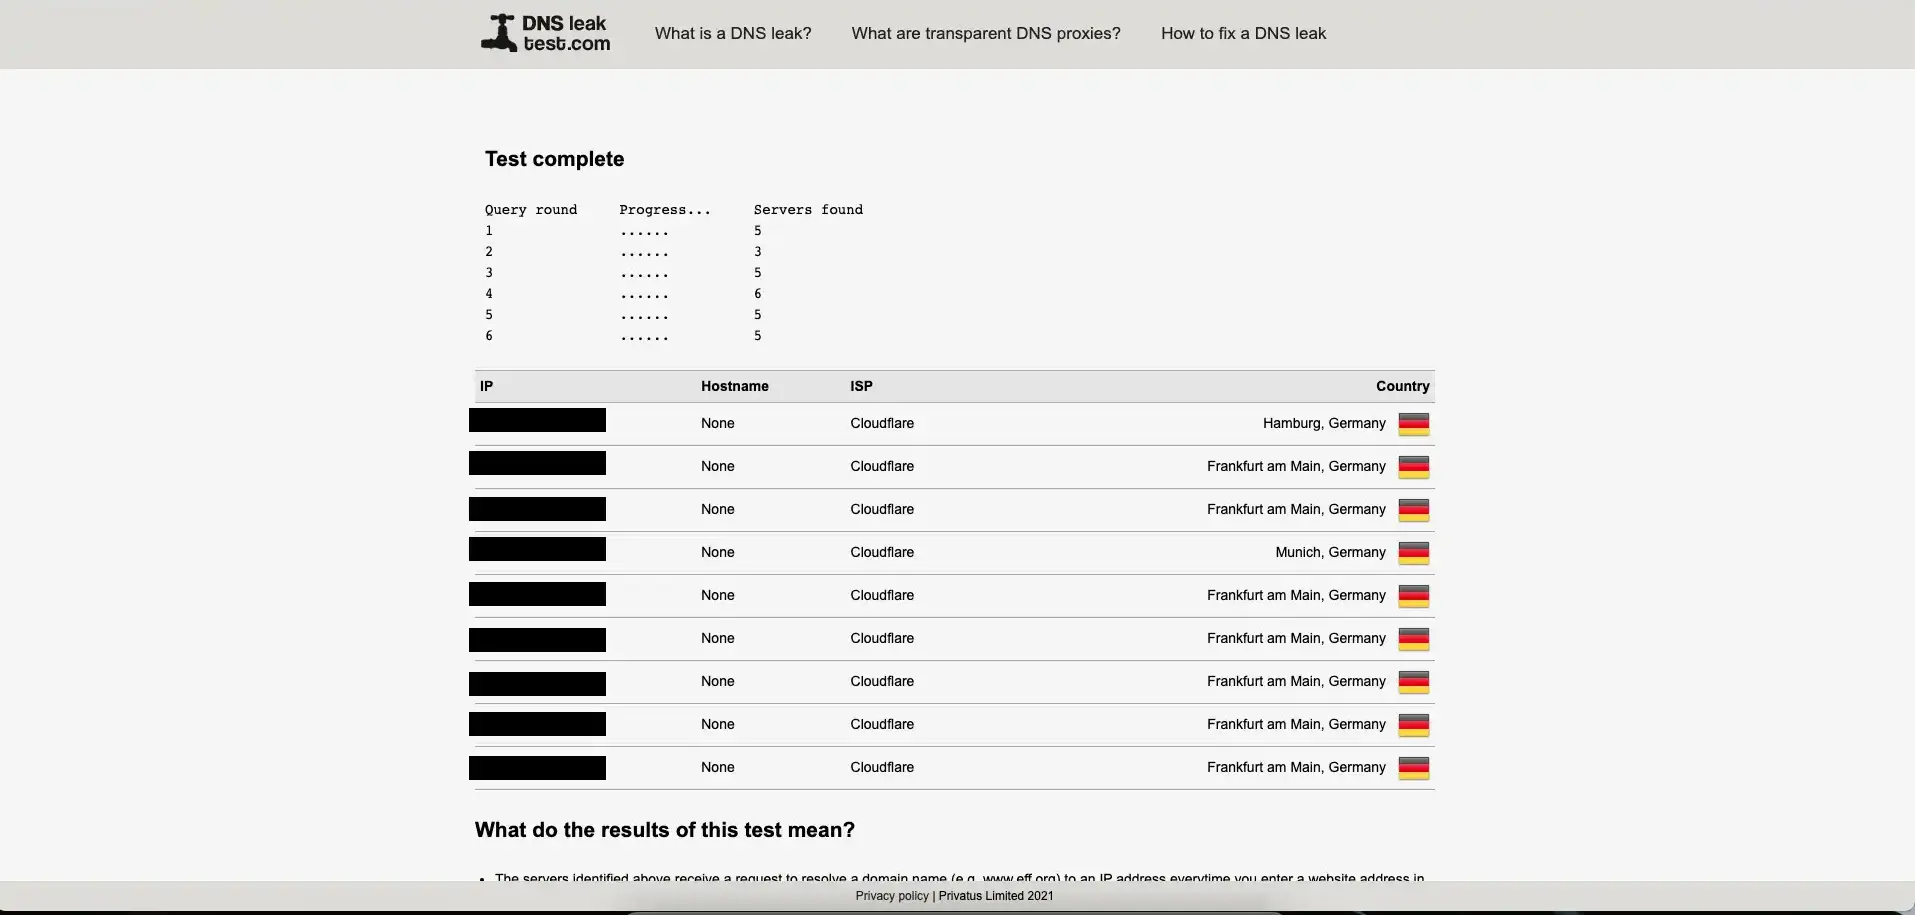
dnsleaktest.com
This website checks whether the network leaks your real IP address. Be sure to restart
the network daemon (e.g., NetworkManger on Linux) before starting this test to avoid
false-positive results.
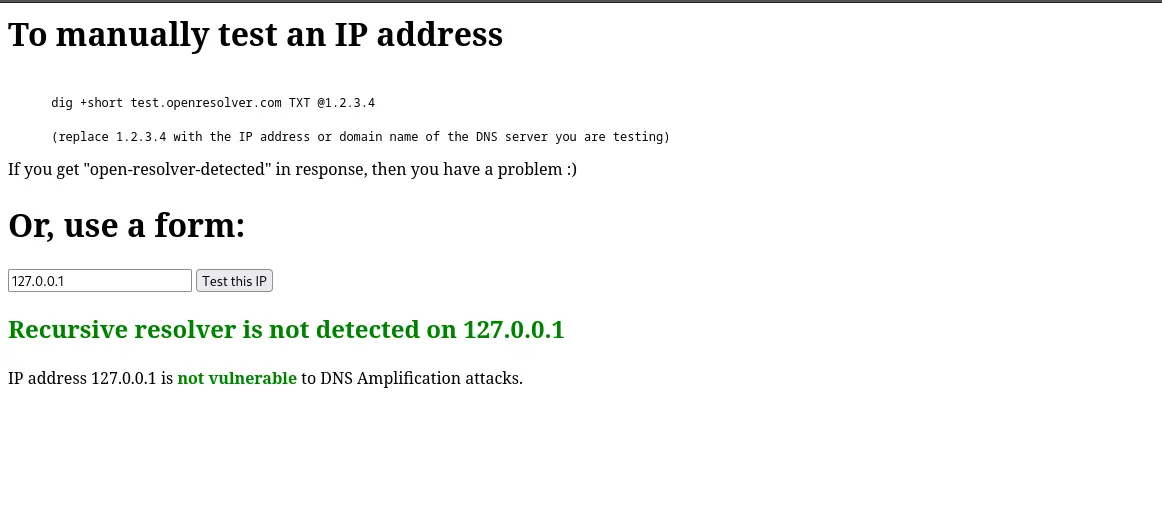
openresolver.com
We can use this website to check whether our DNS is vulnerable to DNS amplification attacks. This kind of vulnerabilities occur when a misconfigured DNS server acts as an open resolver; meaning that it responds to queries from any source and from any interface. DNS amplification attacks can be mitigated by properly configuring network filtering through a firewall. When everything is properly configured, you should get a screen like the one on the following picture: